Turn Pictures into Great Videos with Wondershare Filmora
Make a sensational video using Wondershare Filmora with your photos. Filmora offers free video effects, royalty-free audio, elements, and transitions.
Whether it’s a birthday celebration, a marriage anniversary, or a cherished first date, capturing those special moments through selfies or professional photographs is a timeless tradition.
With Wondershare Filmora video editor, you can turn your still photos into a memorable video.
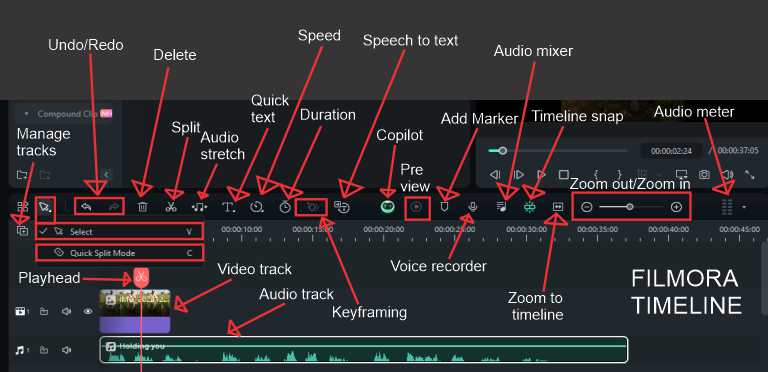
Making Video with Wondershare Filmora
Head Up
Program: Wondershare Filmora 9
Estimated Completion Time: 15 Minutes
Who can learn this: Beginners – this tutorial is very basic and made easy so that anyone who can use computer software will get along.
Step 1: Required Tools and System Requirements
Filmora 9, Windows PC or Mac.
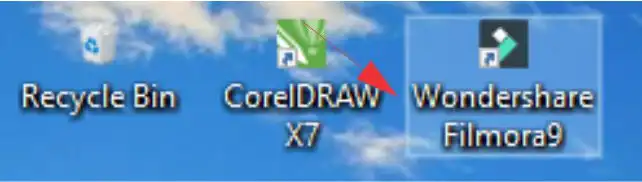
1. Launch Wondershare Filmora
- Double-click on Filmora’s desktop icon or click the Windows logo and type Filmora into the search box to launch the application.
- A welcome screen will be displayed where you create a New Project or open a Recent Project. As this is your first time, the Project Library will be empty.
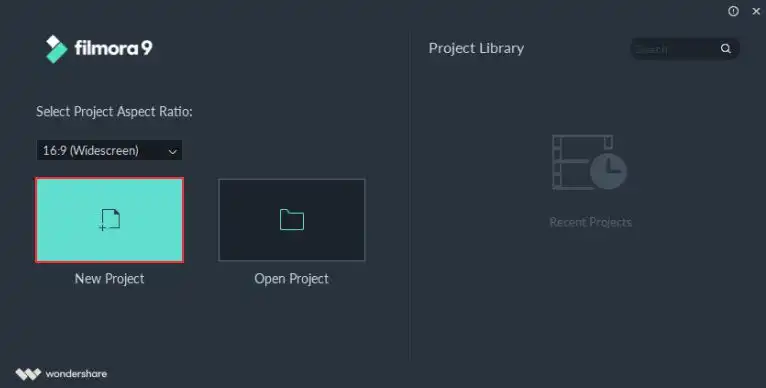
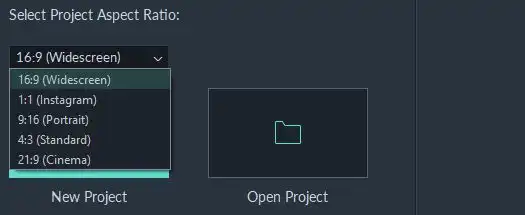
2. Select Project Aspect Ratio
- Below the logo, you can drop down the caret and choose your preferred aspect ratio. By default, it is set to 16.9 (Widescreen). Let’s maintain the default aspect ratio.
- If you decide to change this, you may suspend this until the program loads. Click on File, and Project Settings to have access to the panel.
3. Create a New Project
In Filmora’s welcome screen, click New Project to load the video editor. Loading the editor may take a while.
4. Import Pictures or Video
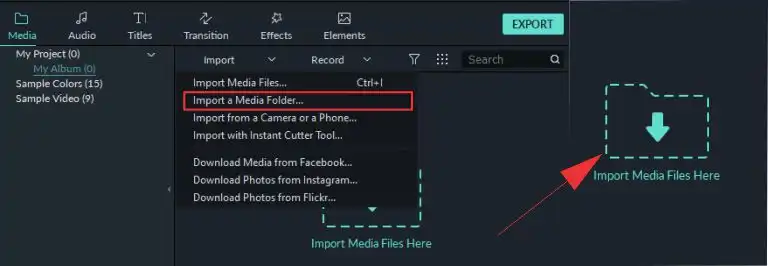
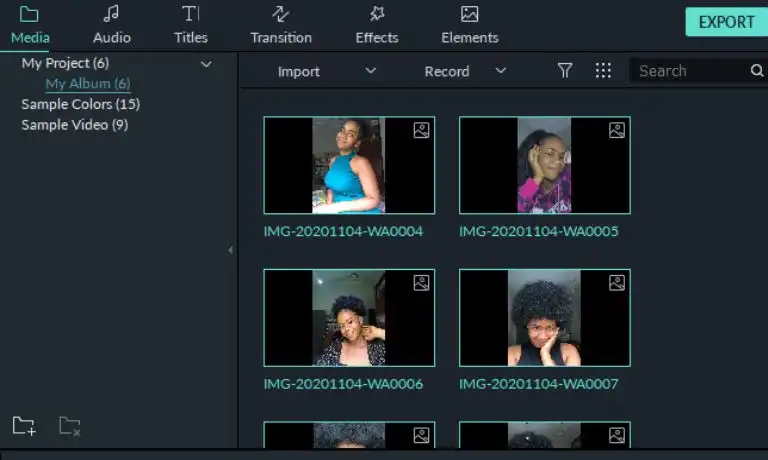
- Select My Album.
- Click the Import button in the upper left corner of the editor to drop down the import menu. You may use the ‘Import Media Files Here.
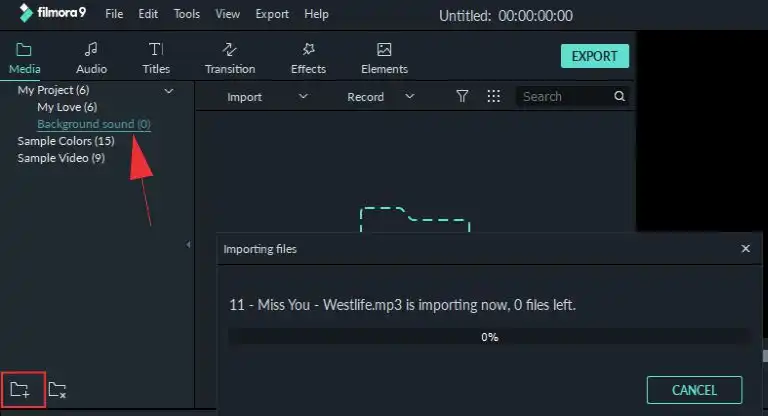
- You can select Import Media Files from the import menu to select photos and the song to add to the project but in this case, I have created a folder that contains the photos so we will be using the second option “Import a Media Folder.”
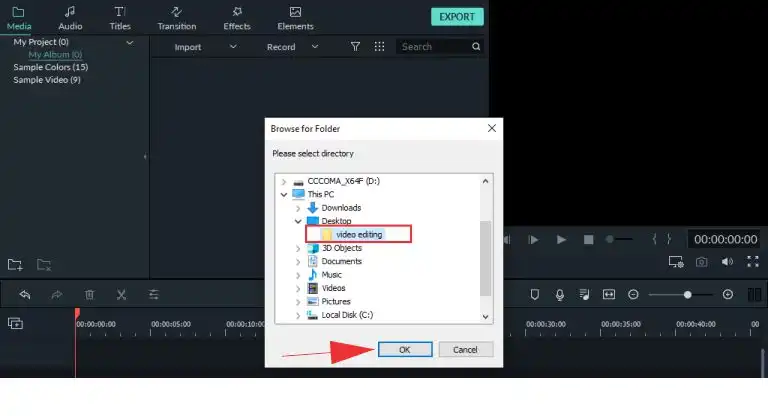
- Select the folder location from the window and click OK to load images.
5. Organize Your Files
Organizing your files may not seem necessary since this is only a small project. But if you are running a commercial video editing, there is a need to organize your files for easy access. So, let’s do just that.
Renaming Folder
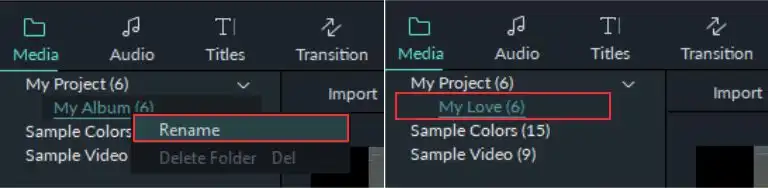
To rename an existing folder:
- Right-click the folder.
- Select Rename from the options.
- Type a new name and press the return key (Enter key) on the keyboard.
Creating Folder
- At the right bottom, click on the folder icon to create a folder.
- Give a descriptive name to the folder
Deleting Folder
When I right-click to rename My Album folder, you will notice my Delete option was not active. This is because I do not have permission to delete a default folder. The folder was created by Filmora.
To delete your folders:
- Right-click on the folder
- Select Delete Folder
Alternative to Deleting Folder
- Select the folder.
- Click the folder icon with the X at its bottom tip.
Saving Project
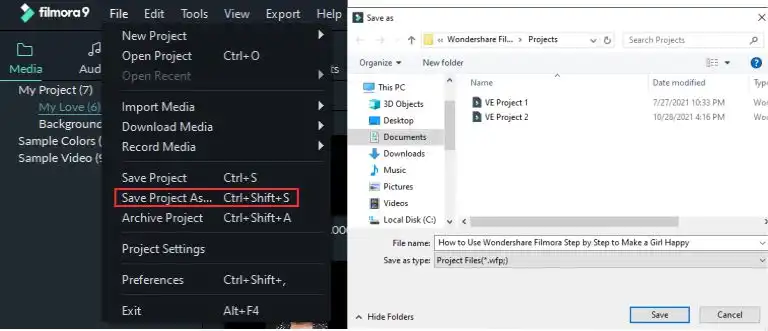
- Click on File
- Select Save Project As from the File menu
- Name the project
- Click Save
6. Drag and Drop the Photos and Audio to the Timeline
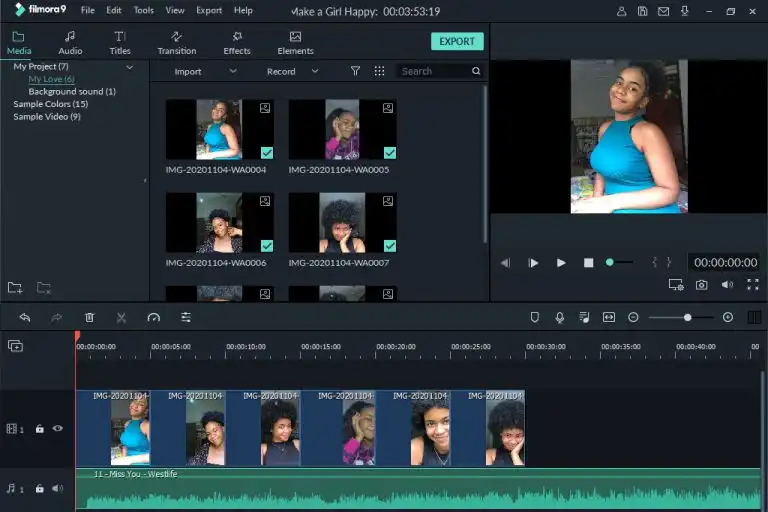
- Open the folder containing the photos
- Select all the photos
- Drag them to the video track
- Open the sound folder as well and drag the song to the audio track
7. Creating a Background for the Video
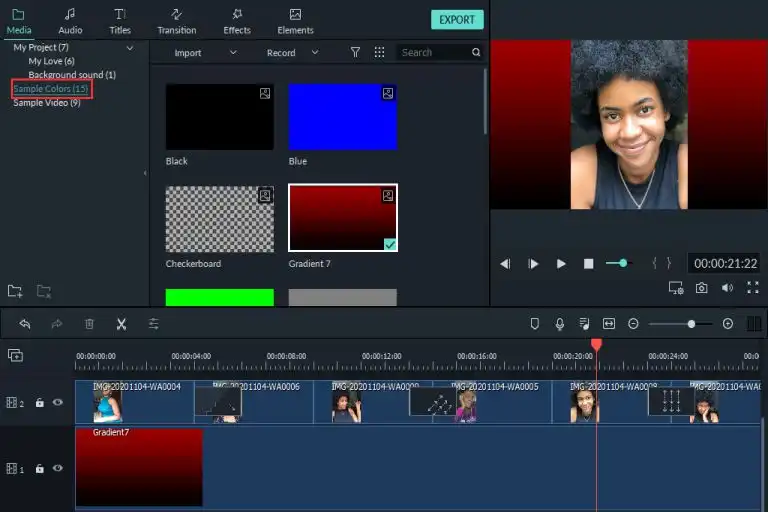
- On the Media menu, select the sample Colors folder
- Drag your preferred color to the video track or import your favorite photo
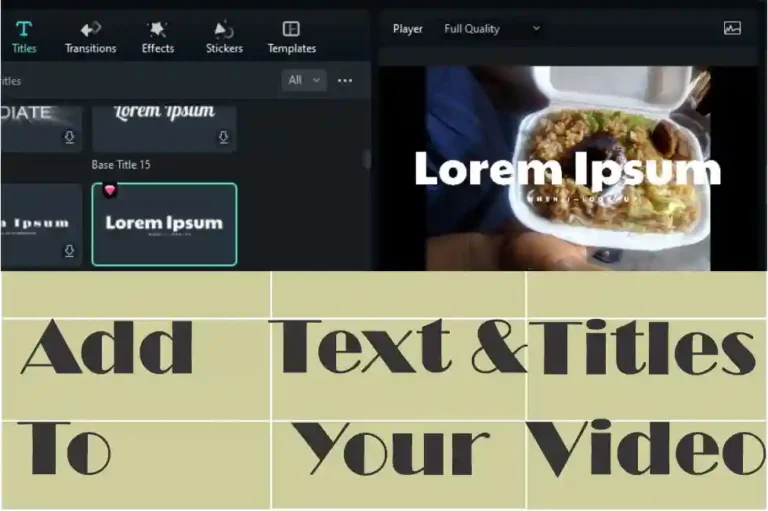
8. Add Text
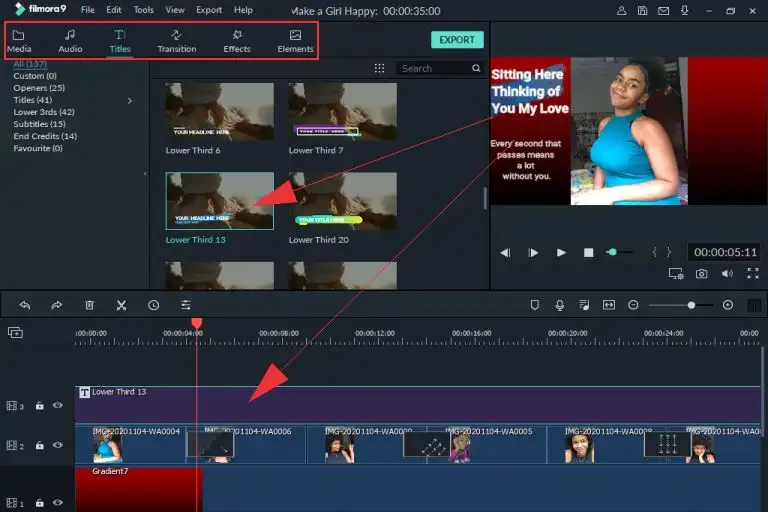
- Add title text to the video by clicking the Title menu and dragging your preferred title style to the video track to make the video interactive by sharing your thoughts as images slide one after the other.
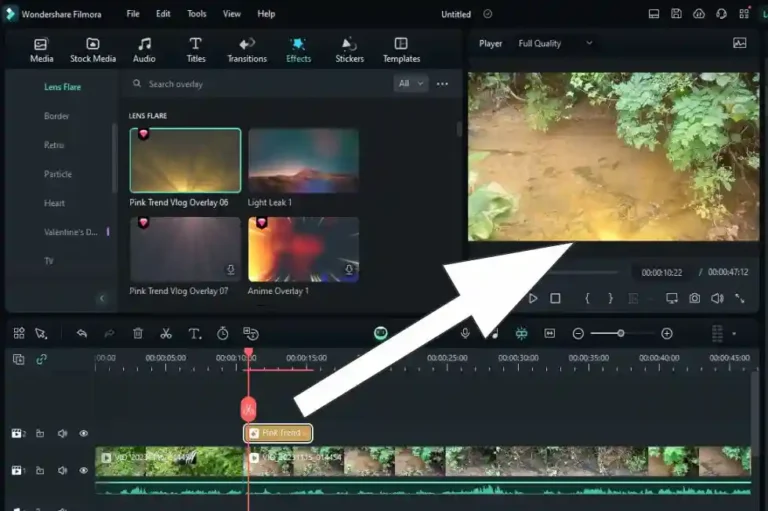
9. Adding Transition
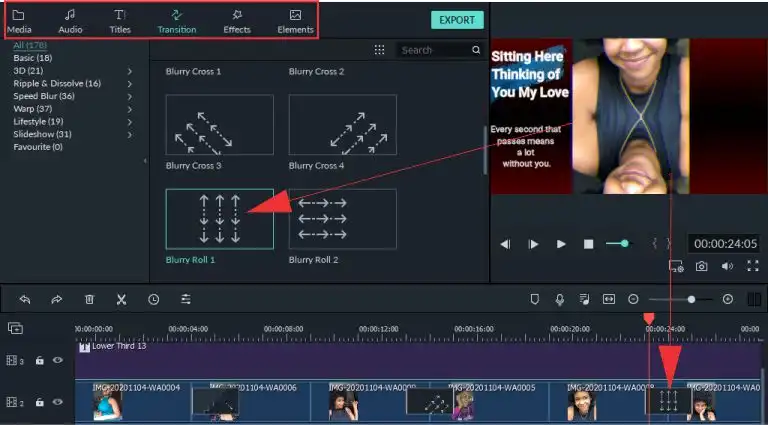
It’s time to make your images slide in beauty to make the video a lot more interesting. This effect makes photos start or end smoothly.
- Click at the beginning or the end of a picture you want to apply the transition.
- Double-click or drag the transition you want to use
10. Export Video to Share
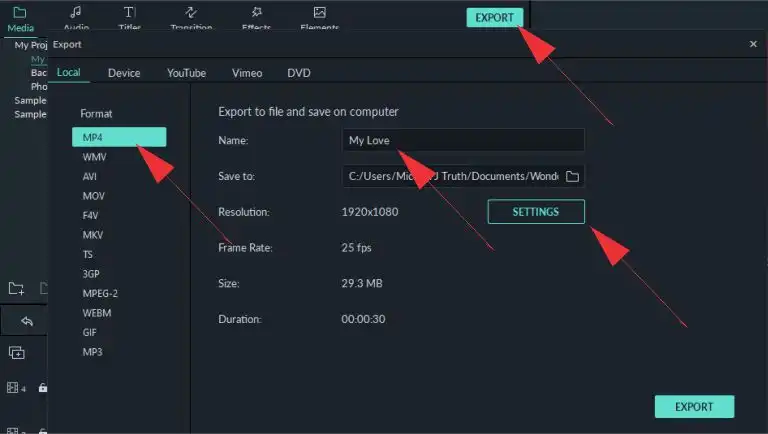
To be able to play the video in media players, you need to export it. To export the project, follow the instructions.
- Click on the Export button to open the export dialog box.
- Pick file format under Local. The default is MP4. We are going to maintain it.
- Click in the Name column to edit it.
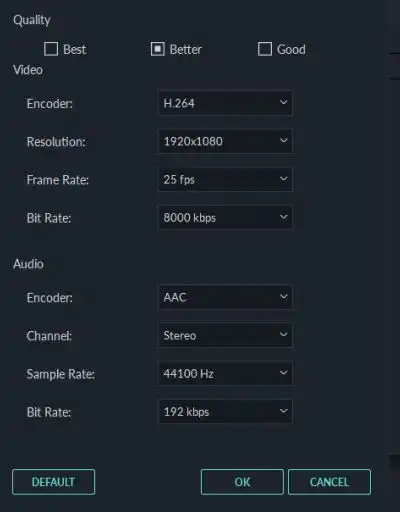
- For additional settings like resolution and frame rate, click Settings to open the dialog box. After selecting your options, click ok to apply settings. We will leave all settings as they are and proceed.
- Click Export to convert the video.
Filmora is well-equipped to help export videos in almost all video formats. You can select the device tab to pick the type of device you intend to send the video.