Practical Ways to Use Shape Tool in CorelDRAW (with Pictures)
Here, we will learn more about the Shape tool in CorelDRAW to master how to finetune shapes and images to create impressive designs.
In our previous lesson, we explored the functionality of the Pen tool. We also utilized the pen tool in our lesson; 5 Ways to Remove Background in CorelDraw (Fast and Easy). We drew a path around the image intended for cropping from the background. Subsequently, employing the “Shape tool,” we made adjustments to the image.
How to Use Shape Tool in CorelDRAW
Here, we will learn more about the Shape tool in CorelDRAW to master how to finetune shapes and images to create impressive designs.
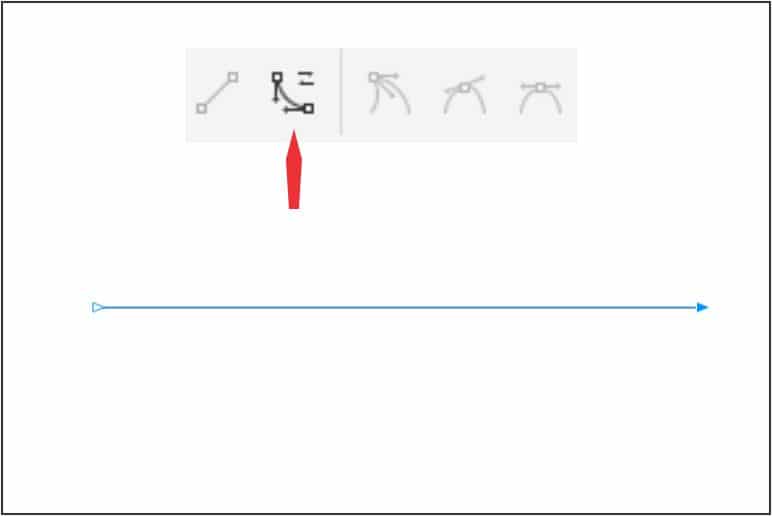
Unlike the Pen tool, the Shape tool has a couple of additional options you need to know about. These additional options support the tool to deliver massive results.
Before we dive into shaping our previous object, let’s look at the options that come with the “Shape tool.”
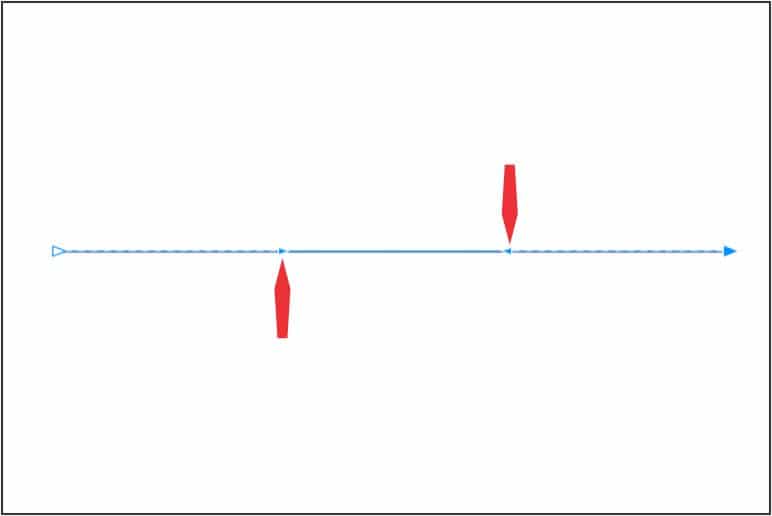
Click on the Shape tool and select the object in the previous topic. You will notice 8 additional light blue items. Two items on each corner, top and bottom.
The item is called Node.
What are Nodes in CorelDRAW?
Nodes are specific points along the path of an object where you can manipulate the shape. Each node has control handles that allow you to adjust the curvature and direction of the path.
Nodes can be:
- It can be created or added
- It can be deleted
- It can be edited
- It can be moved around
- Nodes can be joined
Types of Nodes in CorelDRAW
In CorelDRAW, nodes are fundamental elements that define the shape of an object, such as a curve or line. Nodes act as control points that determine the position and characteristics of the shape.
Nodes can be changed from one type to another e.g., line node to cusp. There are four node types in CorelDRAW.
To access them, click the Shape tool, select the object and the options to manipulate the object will be displayed on the “Property bar” below the “Standard bar.”
1. Cusp nodes
Make the node’s intersecting line take on the shape of a corner or point when you adjust
the position of the node’s control points.
2. Smooth nodes
Make the node’s intersecting line take on the shape of a curve. Each control point can
be shortened or lengthened independently, giving you smaller or larger angles to work with.
3. Symmetrical nodes
Make the node’s intersecting line take on the shape of a curve as well as intersect
the node at the same angle.
4. Line nodes
Let you shape objects by changing the shape of their segments. You can make a curved
segment straight or a straight segment curved.
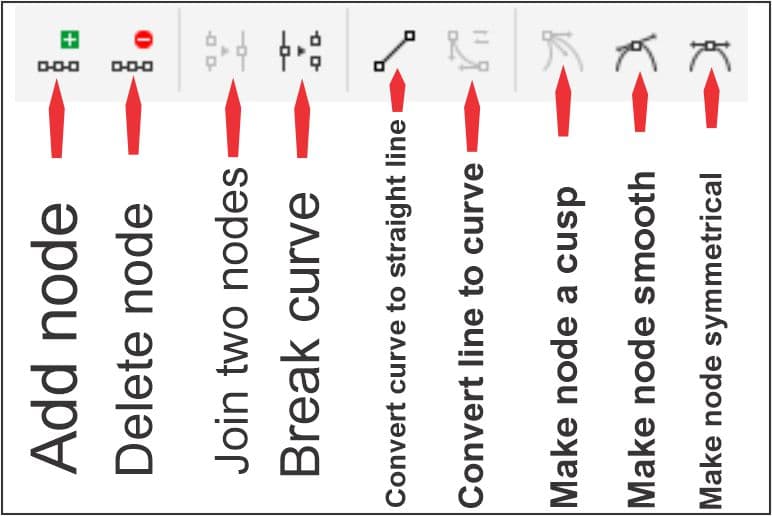
An object converted to curves may have multiple nodes, to get exactly the shape you want, you may need to add or delete them.
In addition to add and delete, you can find other options which can help modify the object. These are the four node types we looked at in types of nodes; Cusp nodes, Smooth nodes, Symmetrical nodes, and Line nodes.
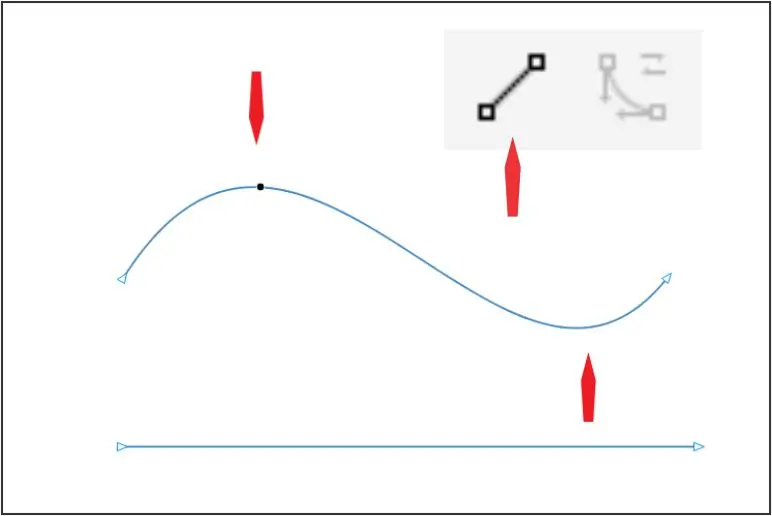
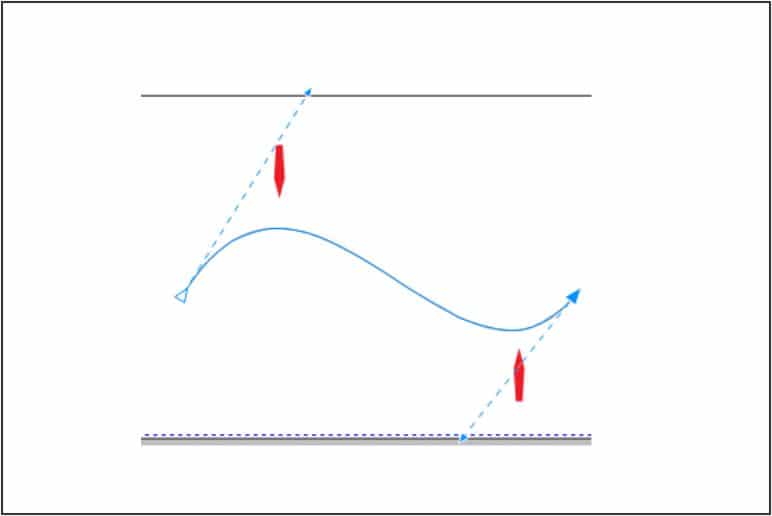
Convert Line to Curve
Let’s take a moment with this line segment to study line nodes and how to convert a line to a curve.
Using the Pen tool, draw a straight line.
To complete the line, double-click or press escape or spacebar on the keyboard. You will notice the tool is deselected.
Next, click on the line and select “Shape tool”
Since this object is a straight line; we will be converting it to a curve.
Click on the arrow on the right side
Before, the options were all greyed out – after clicking the end of the line, you will notice the “Convert to Curves” option is active.
Select Convert to curve
Drag the left handle which appeared after converting the line upward
Drag the one on the right downward
This will create an uphill shape from a straight line. You can convert it back to a straight line.
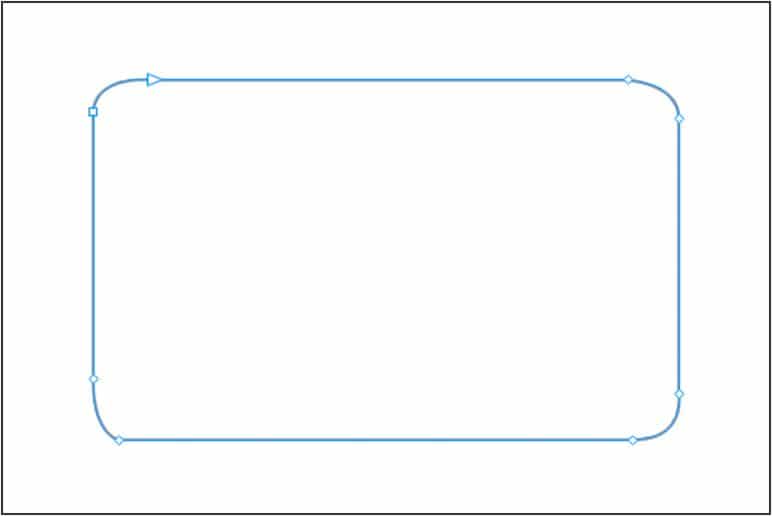
To convert the shape back to a straight line:
Click on the left arc
Click on the line segment option on the “Property bar” to convert back to a line

Refer to the photo above to convert it to a line.
Working with the Previous Object
Finally, let’s work with our previous object. Note that, I have made a little change to the shape.
We will be reshaping each corner to look perfect.
Select the shape
Select the Shape tool
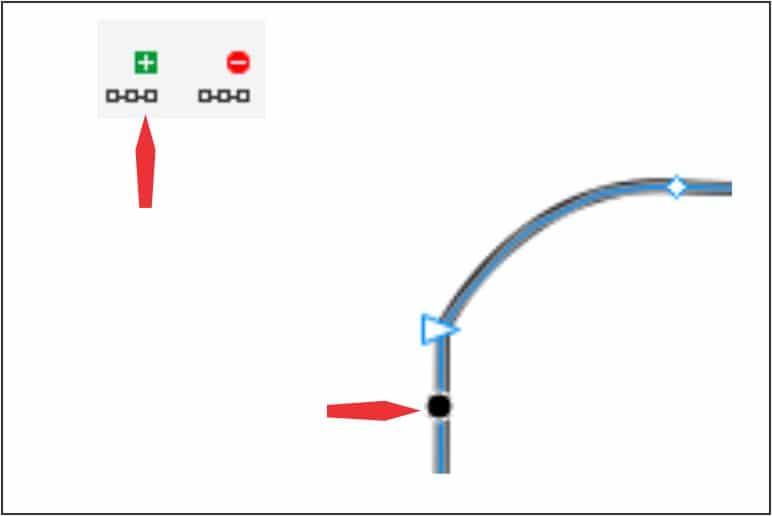
Click below the bottom node
Click the add node button to add a node
After creating the third node, click on the middle node and select the smooth node type
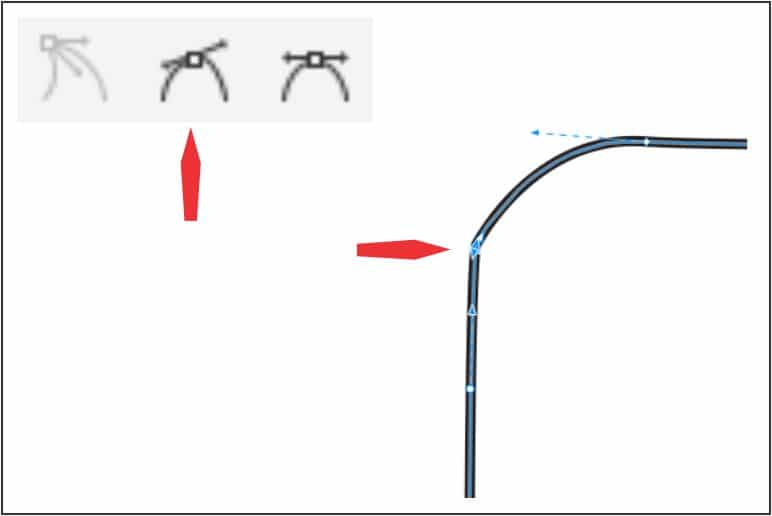
Double-click the node to get rid of it
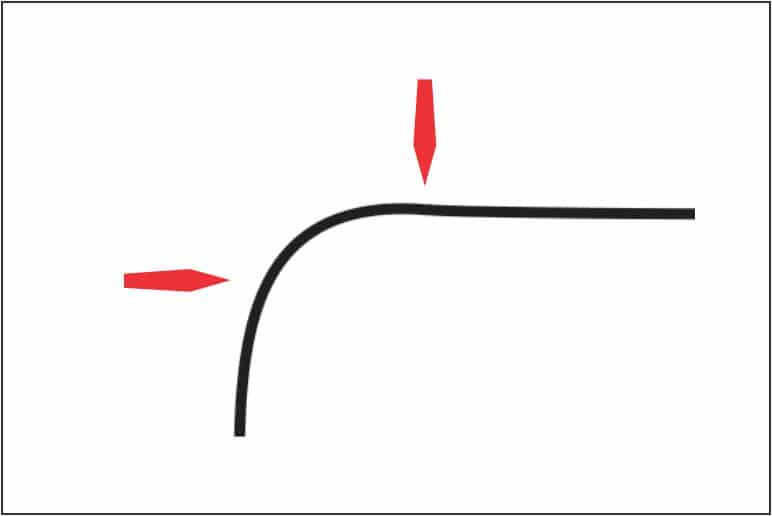
You will notice our corner is almost perfect.
To tidy up things, we will add a new node at the top as it looks a little jerky.
Follow the image to clean things up.
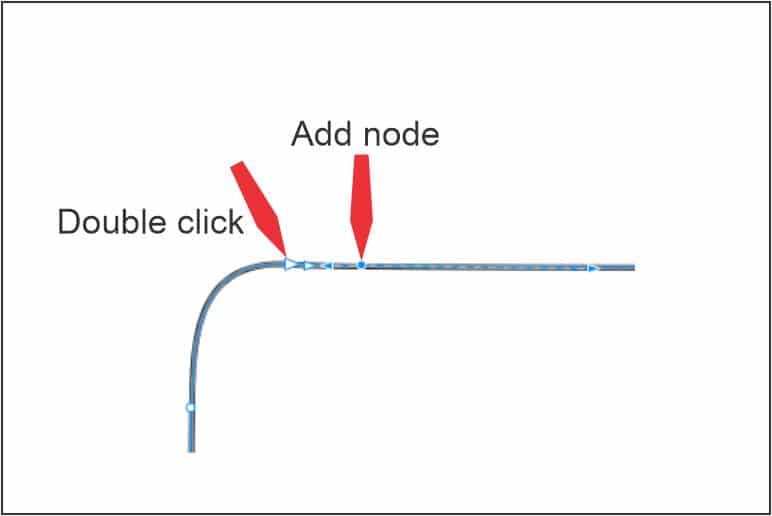
This time, the Smooth node option will not be active. You don’t need it, just double-click as in the photo to remove the node.
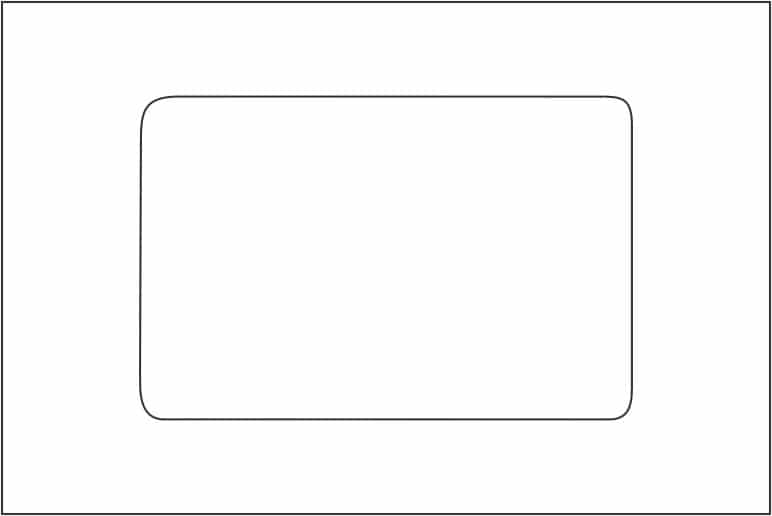
Repeat around to have something similar to the below photo.
This looks a lot like the perfect shape we created using the Pen tool.
To get a clean shape; you must practice severally and master the tools. It takes time and practice.
You have just learned how to use the Shape tool in CorelDRAW. This should help you draw perfect shapes.
Let me know how many shapes you will draw after this lesson. Do you remember any of the four nodes in CorelDRAW?
The video below shows how you can use the shape tool to remove the background in CorelDRAW