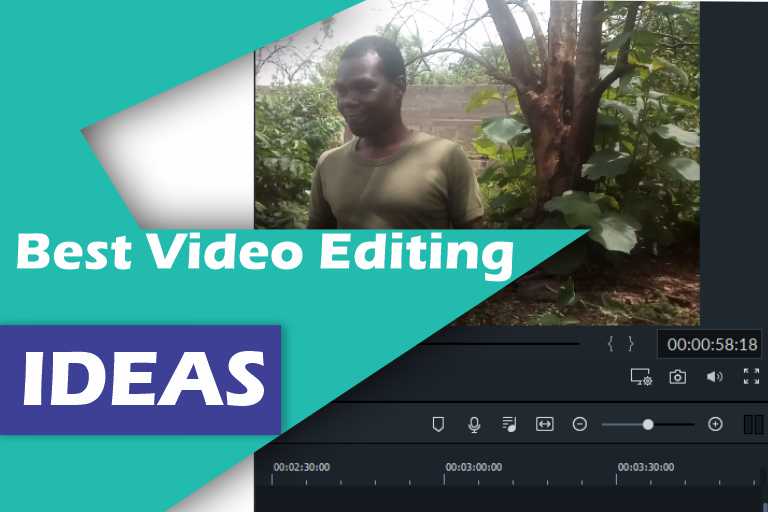
13+ Best Video Editing Ideas for Beginners in 2024
In 2024, the landscape for video content is full of opportunities. Need a starting idea? I’ve got you covered.
Like many others, you’ve heard people are making money online by uploading videos on YouTube, TikTok, and Instagram. You’ve decided to join the video wagon but need a starting idea. This is your guide to 13+ exciting and creative video editing ideas and my top 5 choices to help you pick the best idea in 2024.
Best Video Editing Ideas to Unleash Your Creativity
A few days before the end of 2023, a friend invited me to his boutique to discuss some questions he had about making money with videos online.
He already had someone recording his motivational speeches, and he felt it was time to explore opportunities for earning from those videos.
Read my article on 13 ways to make a viral video to understand how to generate revenue from your video before you continue this article. It will help you make a better decision.
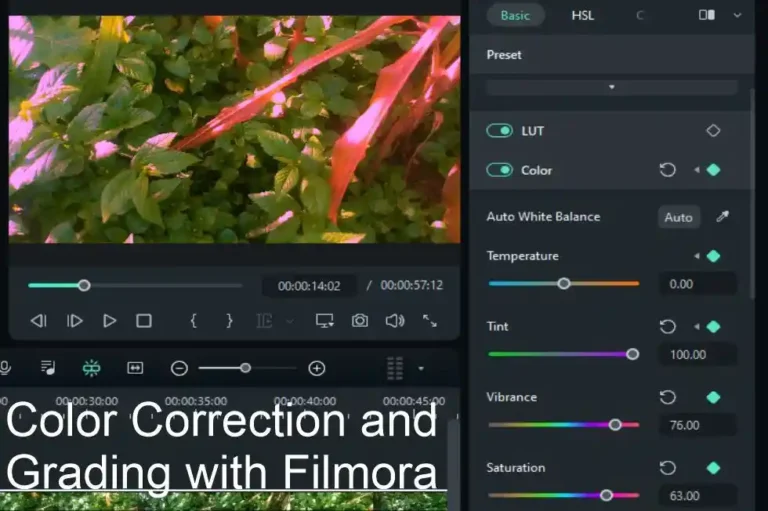
Additionally, utilizing tools like FlexClip can streamline your video editing process and enhance the quality of your content.
Generating money with videos, whether online or offline, involves confronting various factors.
However, every business begins with an idea. In this post, I will provide you with some unique ideas to kickstart your video business.
Let’s dive in.
1. Make a Tutorial or How-To Video

I know you do not want to hear this from me but let’s face fact. Not every video you watch on the internet makes money.
And not everyone who claims they are generating revenue from their video is honest with you.
The fact that a video is receiving love across the internet doesn’t mean it’s receiving money.
If it’s your dream to make money online you have to be strategic about it. Some videos make more money than others.
In addition to that, you have to create a unique video to appeal to both viewers and advertisers.
One sure bet to generating income with your videos online is creating tutorials.
Instead of assuming celebrity status online, rather share your knowledge and passion by creating a tutorial or how-to video.
Break down complex processes into digestible steps, using visuals, text overlays, and graphics to make the information clear and engaging.
Effective communication through editing is key to keeping your audience hooked and learning.
People want to learn how to do activities, whether learning how to start their computer, cool boot the computer, lock their iPhone, block a number on their iPhone, or create a YouTube account on Android among others.
Sharing this type of information will help you get viewers, and also monetize your video
Creating Tutorial or How-to Videos
Here is a list of things to do to start creating a how-to video.
- Choose a Clear Topic
- Plan Your Content
- Gather the Necessary Tools and Materials
- Set Up a Well-Lit and Quiet Shooting Space
- Speak Clearly and Concisely
- Use a Good Quality Camera or Smartphone
- Write a Script or Outline
- Record the Video in Segments
- Demonstrate Each Step
- Edit the Video for Clarity
- Add Text Overlays or Graphics
- Include an Intro and Outro
- Export and Share the Video on Relevant Platforms
2. Embark on DIY Projects
I am that guy with many hobbies. I love crafts, home design, gardening, etc. I believe in fixing my problems because it’s fun.
Not forgetting that it saves me money too.
There are many people out there who are looking for quick fixes on the internet. People want to engage themselves in their leisure time solving their problems.
And these people 99% of the time tend to the internet for solutions. “Well, I made that number up”.
But there’s no doubt that people want to learn how to fix stuff on their own. This has provided a big opportunity in the video industry.
If you know how to do something, go ahead and record the procedure, then upload it on Facebook or Pinterest.
Talk about how to start a home garden, create a video on home decor, share kitchen ideas, and explore activities such as stitching, sewing, making furniture, and much more.
It is easy to make money from this type of video because you will recommend the tools you use in the video and also generate ad revenue.
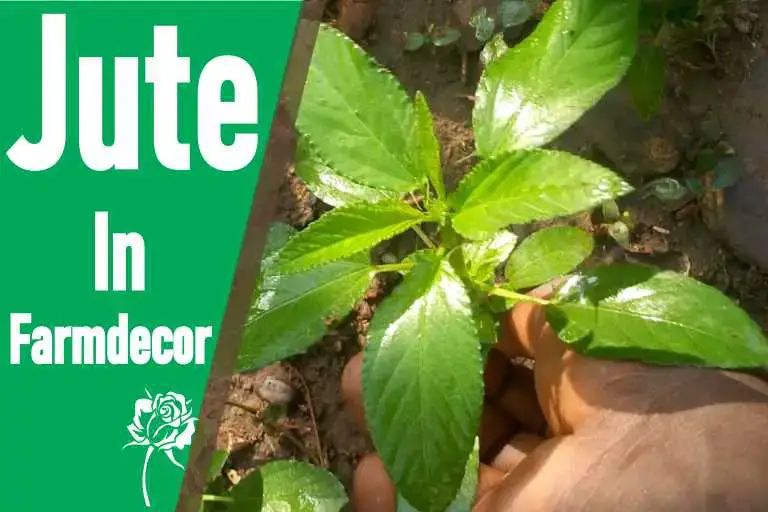
Apart from that, you will directly benefit from the activities you engage in. For instance, if you teach people how to grow vegetables, you can harvest the produce for your meals after creating the instructional video.
I recently wrote an article discussing how to grow jute, and I also made a video. Now, I am preparing a meal using the harvested jute. That’s a direct benefit.
Doing DIY Project
Start by planning your DIY project thoroughly. Outline the steps you’ll take and ensure you have all the necessary tools and materials.
Record each step of your project. Make sure to capture close-ups of intricate details and overall shots to provide context.
If your project involves unique or innovative techniques, highlight them in the video. Viewers appreciate learning something new.
Also, don’t be afraid to show mistakes or challenges encountered during the process. It adds authenticity and can be a valuable learning experience for viewers.
3. Start Product Review
For years now internet marketers have made money from product reviews. Many people before buying a product read about the product to make an informed decision.
Such videos can be highly monetizable and make you a full-time income to quit your day job.
Share your opinions and insights by creating a product review video.
Showcase the product, share your experiences, and use editing techniques such as close-ups or demonstrations to provide a comprehensive review.
This not only helps your audience make informed decisions but also allows you to demonstrate your editing skills in a practical context.
The best product reviews are those that are done by people who own the product and have used it.
For your video to make an impact, review products you own and share your personal experience.
There’s no limit to the products you can review. Talk about PCs, iPhones, smart watches, smart homes, graphic design software, and video editing software among others.
How to do a Product Review Video
- Choose a Product to Review
- Research and Familiarize Yourself with the Product
- Gather High-Quality Visuals of the Product
- Plan the Structure of Your Review
- Introduce the Product Clearly
- Provide Relevant Product Information
- Share Your Initial Impressions
- Discuss the Key Features and Specifications
- Demonstrate How to Use the Product
- Share Personal Experiences or Insights
- Showcase the Product in Action (if applicable)
- Mention Pros and Cons
- Provide Honest and Constructive Criticism
- Rate or Score the Product
- Add Graphics, Animations, or Overlays
- Use Close-Ups to Highlight Details
- Consider Including Comparison with Similar Products
- Address Common User Concerns or FAQs
- Include Background Music or Sound Effects (optional)
- Conclude with a Summary and Final Thoughts
- Include a Call-to-Action or Recommendation
- Add an Outro Sequence
- Edit for Clarity and Flow
4. Start a Cooking Show

Welcome to the culinary journey where flavors come to life!
Edit cooking videos, focusing on clear instructions and delicious visuals.
I am working my way gradually into this space. I love cooking. I’ve been in the kitchen helping my mum all my life.
Fortunately, Beatrice, my girlfriend is a chef so I’m learning a lot in this space.
Dive into the art of cooking, and guide people through the world of cooking with clear instructions, and delightful visuals.
Starting a Cooking Show
Ensure that the cooking instructions are easy to follow. Use text overlays or voiceovers to explain each step concisely.
Break down the process into manageable segments, making it user-friendly for viewers to replicate the recipe.
Showcase the ingredients in an aesthetically pleasing manner before starting the cooking process. This builds anticipation and interest.
Use close-up shots to highlight key cooking techniques and ingredients. This helps viewers visualize the details more clearly.
Infuse your personality into the video. Share anecdotes, tips, or variations to make the content more relatable and engaging.
Consider addressing the camera directly at times to establish a connection with your audience.
5. Start a Travel Vlog
Personally, traveling is not my thing. But it made it among my top choices because it is an interesting space to thrive.
What I appreciate about travel videos is the authenticity they bring by showcasing the activities and experiences you engage in.
If you love traveling, vlogging is exactly your thing.
Transform your travel experiences into captivating vlogs.
Take your viewers on a journey by showcasing interesting places, narrating your adventures, and adding background music to set the mood.
Experiment with different editing techniques, such as speed ramps or color grading, to enhance the overall visual appeal of your travel vlog.
Travel vlogs will help you know many places.
Starting a Travel Vlog is this Simple
- Plan Your Itinerary
- Pack Essential Camera Gear
- Capture B-Roll Footage
- Record Personal Narration
- Include Shots of Landmarks and Scenery
- Showcase Local Cuisine and Culinary Experiences
- Interact with Locals
- Document Your Accommodations
- Add Background Music to Enhance Mood
- Use Creative Transitions
- Edit for a Dynamic and Engaging Flow
- Include an Intro and Outro with Your Vlog’s Title
- Add Relevant Text or Captions
6. Create a Music Video
I will share one of my music with you one of these days. But you have to promise not to tell anyone?
It was a tribute to 2Pac. Yes! You heard me!
For music enthusiasts, consider stepping into the studio to lay down a few tracks. Following that, embark on creating a music video.
Cost need not be a hurdle; however, ensuring an engaging storyline and maintaining high-quality visuals will elevate the overall impact of your musical creation.
Experiment with effects, transitions, and visual elements to create a seamless blend of audio and visual artistry.
While I didn’t have success in this space, it is something I love. I have always wanted to be a musician.
I think if you create something awesome today you may receive lots of love on the internet. You may even go viral landing a record deal.
How would you know? Just try it.
How to Create a Music Video
Follow these instructions to make a video for your soundtrack.
- Record a Song
- Develop a Concept or Storyboard
- Plan Your Shots and Scenes
- Gather Necessary Equipment (Camera, Lighting, Props)
- Scout Locations
- Assemble Your Crew (if applicable)
- Rehearse Choreography or Actions
- Set Up Proper Lighting for Each Scene
- Capture High-Quality Footage
- Pay Attention to Composition and Framing
- Record Multiple Takes if Necessary
- Capture B-Roll Footage for Variety
- Plan for Lip Syncing or Instrument Playback
- Utilize Creative Camera Angles and Movements
- Incorporate Visual Effects or Filters (if desired)
- Edit the Video to Align with the Beat and Mood of the Music
- Add Transitions, Cutaways, and Special Effects
- Sync the Visuals with the Audio
- Enhance Visual Appeal with Color Grading
7. Make an Interview or Q&A Video
My cousin is in this space, and it’s working for him. However, I believe there’s a lot to navigate, especially if you’re not an established authority.
Indeed, establishing yourself in niches like music videos and interviews demands dedication, especially in generating organic traffic.
While the journey might involve substantial effort, the successes others have achieved indicate that it’s a viable path.
If this aligns with your passion and aspirations, don’t hesitate—start your journey now.
Making an Interview Video
Elevate your content by editing interviews or Q&A sessions. Add subtitles, graphics, or cutaways to emphasize key points.
Use your editing skills to maintain a smooth flow, keeping your audience engaged throughout the conversation.
This idea not only showcases your technical prowess but also your storytelling finesse.
- Plan Your Interview Questions
- Choose a Suitable Location
- Set Up Proper Lighting
- Use Quality Audio Equipment
- Position the Camera at Eye Level
- Frame the Shot Appropriately
- Ensure a Clean and Professional Background
- Conduct a Test Recording
- Dress Professionally
- Brief the Interviewee on the Format
- Begin the Interview with an Introduction
- Ask Clear and Concise Questions
- Allow Ample Time for Responses
- Maintain Eye Contact with the Interviewee
- Be Attentive and Engaged
- Record Additional B-Roll Footage if Needed
- Thank the Interviewee for Their Time
- Edit the Video for Clarity and Flow
- Add Transitions or Graphics as Necessary
8. Create a Mockumentary
Infuse humor and creativity by creating a mockumentary.
Blend real footage with a fictional narrative, adding a touch of satire or humor to your video.
This unique approach allows you to experiment with storytelling in a light-hearted and entertaining manner.
Steps to Make Mockumentary
- Develop a Satirical Concept or Theme
- Write a Script with Humorous Elements
- Plan Pseudo-Interviews or Narration
- Create a Cast of Characters or Participants
- Set Up a Documentary-Style Shooting Environment
- Use Handheld or Unsteady Camera Movements
- Include Mockumentary-style Talking Head Shots
- Introduce Conflicting or Absurd Storylines
- Incorporate Mock Interviews or Testimonials
- Mix Realistic Footage with Staged Situations
- Add a Mockumentary-style Voiceover
- Use Deadpan Delivery for Satirical Effect
- Include Bloopers or “Behind-the-Scenes” Moments
- Emphasize Over-the-Top Characters or Scenarios
- Maintain a Consistent Tone and Style
- Add Satirical Graphics or Text Overlays
- Edit for Timing and Comic Effect
- Include a Faux Cinéma Vérité Aesthetic
- Experiment with Fake Documentary Techniques
- Consider Adding a Mockumentary-style Score
- Maintain a Pseudo-Serious Atmosphere
- Add Intro and Outro Sequences
- Edit for Cohesiveness and Satirical Impact
9. Make a Short Film
Challenge your creativity by crafting a short film. Develop characters, build a plot, and experiment with different camera angles and transitions to tell a compelling story.
This idea allows you to explore the cinematic side of video editing, honing your skills in narrative construction and visual storytelling.
Steps to Make a Short Film
- Develop a Concept or Story Idea
- Write a Script or Outline
- Plan Your Scenes and Locations
- Assemble Your Cast and Crew
- Gather Necessary Equipment (Camera, Lighting, Sound)
- Create a Shot List or Storyboard
- Rehearse with the Cast
- Set Up Proper Lighting for Each Scene
- Capture High-Quality Footage
- Pay Attention to Cinematography and Composition
- Record Clear and Crisp Audio
- Capture B-Roll Footage for Additional Shots
- Be Mindful of Continuity
- Allow for Creative Expression and Improvisation
- Edit the Footage for Timing and Pacing
- Add Sound Effects or Music to Enhance Atmosphere
- Incorporate Color Grading for Visual Appeal
- Edit for a Cohesive and Engaging Narrative
- Include an Intro and Credits
10. Create a Montage
One of the most enchanting and expressive video editing techniques is the art of crafting a montage.
A montage is essentially a compilation of short clips or images strategically arranged to convey a story, evoke emotions, or showcase the progression of a particular theme.
As a beginner in video editing, this technique not only allows you to experiment with different footage but also offers a canvas for your storytelling skills to shine.
Begin your editing adventure by crafting a montage.
Select a theme, gather short clips or images, and weave them together into a visual narrative.
Experiment with various transitions such as cuts, fades, or wipes to enhance the overall flow and impact of your montage.
This is an excellent way to showcase your storytelling skills and evoke emotions from your audience.
Steps to Create a Montage
- Define Your Theme
- Gather Your Footage
- Organize Your Assets
- Trim and Arrange
- Add Transitions
- Incorporate Music
- Experiment with Effects
- Fine-Tune and Review
- Export and Share
11. Create a Stop Motion Animation
Dive into the world of stop-motion animation. Capture a series of photos and string them together to bring inanimate objects to life.
This hands-on approach to editing allows you to experiment with timing, pacing, and creativity. The result? A unique and visually captivating video that stands out from the crowd.
Starting a Motion Animation
- Choose a Concept or Story
- Develop a Script or Storyboard
- Plan Your Scene and Set
- Gather Necessary Equipment (Camera, Tripod, Lighting)
- Position the Camera on a Stable Surface
- Set Up Your Characters or Objects
- Capture the First Frame
- Make Small Adjustments to Characters or Props
- Capture Subsequent Frames with Incremental Changes
- Maintain Consistent Lighting and Background
- Aim for Smooth and Seamless Motion
- Use Stop Motion Software or Apps
- Add Sound Effects or Music (if desired)
- Edit for Timing and Flow
12. Create Slideshow with Transitions
Craft a dynamic slideshow by compiling a series of photos and incorporating smooth transitions between them.
This simple yet effective technique can be used to tell a visual story, showcase a project’s progress, or even create a captivating presentation.
How to Create a Slideshow with Transitions
- Select and Organize Your Photos
- Choose a Theme or Storyline
- Import Photos into Your Editing Software
- Arrange Photos in a Logical Order
- Add Smooth Transitions Between Photos
- Adjust Transition Timing for a Seamless Flow
- Include Captions or Titles for Each Photo
- Choose Background Music to Enhance the Mood
- Set the Duration for Each Slide
- Add Pan and Zoom Effects for Dynamic Movement
- Incorporate Consistent Color Grading
- Maintain a Cohesive Aesthetic Throughout
- Preview and Fine-Tune Transitions
- Add Intro and Outro Slides
- Consider Using Fade-In and Fade-Out Effects
- Check for Consistent Slide Timing
- Adjust Transition Speed for Visual Impact
- Add Special Effects or Filters (if desired)
13. Highlight Reel
Showcase your best moments and accomplishments by creating a highlight reel. Select impactful clips from various events or projects and edit them together seamlessly.
This not only serves as a portfolio of your work but also leaves a lasting impression on your audience.
Making Reels
- Identify Key Moments and Achievements
- Gather Video Clips and Footage
- Choose a Theme or Focus
- Organize Clips in Chronological Order
- Edit for Pacing and Impact
- Trim Unnecessary Footage
- Use Transitions to Smoothly Connect Clips
- Incorporate Music to Enhance Energy
- Add Text or Captions to Highlight Achievements
- Consider Including Voiceover for Context
- Maintain a Consistent Visual Style
- Aim for a Balanced and Engaging Flow
- Edit for Cohesiveness and Storytelling
- Optimize Audio Levels for Clarity
- Consider Using Graphic Overlays
- Add Intro and Outro Sequences
- Ensure Professional Quality in Video and Sound
- Preview and Adjust Timing as Needed
14. Before and After
Document the transformative process of a creative project by editing together before-and-after footage or images.
Whether it’s a makeover, a DIY project, or a creative endeavor, this idea allows you to highlight your skills and showcase the magic behind the scenes.
Doing Before and After Video
- Select a Creative Project or Transformation
- Document the Initial State or “Before” Phase
- Capture High-Quality Before Footage or Images
- Plan the Steps for the Transformation
- Record the Process of Transformation
- Capture Key Moments and Significant Changes
- Pay Attention to Lighting and Composition
- Use Multiple Angles to Showcase Details
- Highlight Skillful Techniques or Methods
- Record Clear and Concise Explanations (if applicable)
- Document Any Challenges or Problem-Solving
- Record the Final Result or “After” Phase
- Capture the Finished Project from Various Angles
- Showcase Close-Ups to Highlight Details
- Use Smooth Transitions Between Before and After
- Consider Adding Text Overlays or Annotations
- Edit for Clarity and Cohesiveness
- Include Intro and Outro Sequences
- Add Background Music or Narration (if desired)
- Preview and Adjust Timing for Flow
15. Make a Time-Lapse Video
Capture the passage of time by recording a slow process, such as a sunset, construction, or plant growth, and speed up the footage to create a mesmerizing time-lapse video.
This visually appealing technique adds a dynamic element to your content, showcasing your ability to tell stories through the manipulation of time.
Conclusion
Embark on your video editing journey with these 13+ creative ideas. Whether you’re crafting a narrative, exploring visual effects, or simply having fun with different styles, video editing offers endless possibilities for expression.
Remember, the key is to experiment, learn, and most importantly, enjoy the creative process. So, unleash your creativity, and happy editing!
That’s it. I’ve given you more than 13 video editing ideas.
Let me know the one you will be starting in the comment section below.


helloI like your writing very so much proportion we keep up a correspondence extra approximately your post on AOL I need an expert in this space to unravel my problem May be that is you Taking a look forward to see you
Looking forward to see you!
Hey there You have done a fantastic job I will certainly digg it and personally recommend to my friends Im confident theyll be benefited from this site
Hey Whitney, it’s really nice to hear that you like what we are doing on this site.
Wow superb blog layout How long have you been blogging for you make blogging look easy The overall look of your site is magnificent as well as the content
I am happy to hear that.