Color Correction and Grading in Filmora: Step-by-Step
Color correction and grading are essential processes in the post-production workflow of both photography and videography.
For many video editors, navigating color correction and grading feels like solving a complex calculus problem. Color correction and grading are mysteries to beginners; once unraveled, half of the problem is solved.
Instead of starting with sliding colors, first, you should understand what color correction and grading are. This overview gives you a clear line, and you’ll know how to apply the right colors to your clips.
Color Correction and Grading Examples
Let’s look at some of the most amazing plays with colors in legendary movies.
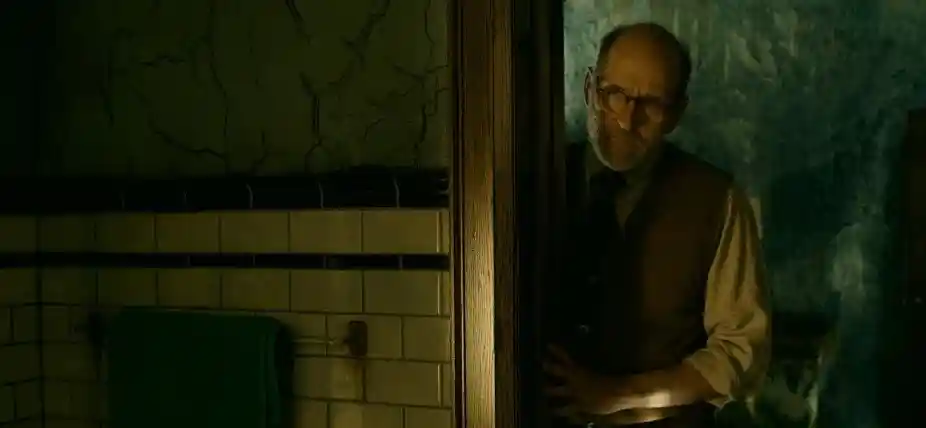
The Shape of Water, 2017
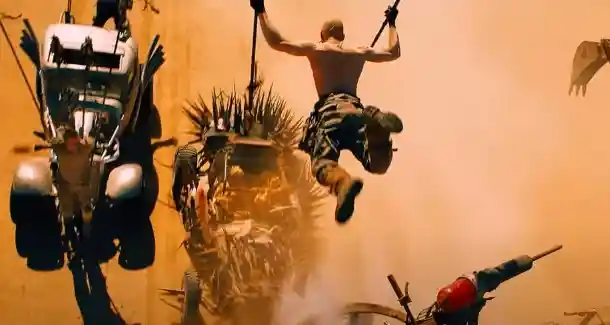
Mad Max: Fury Road, 2015
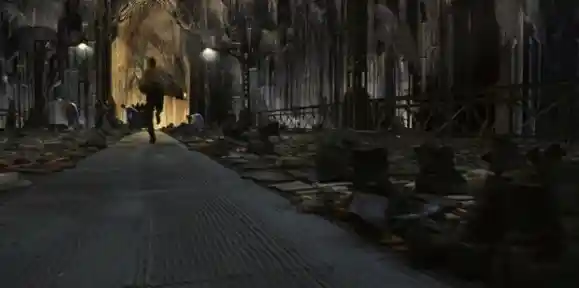
The Matrix, 1999
The Great Gatsby, 2013
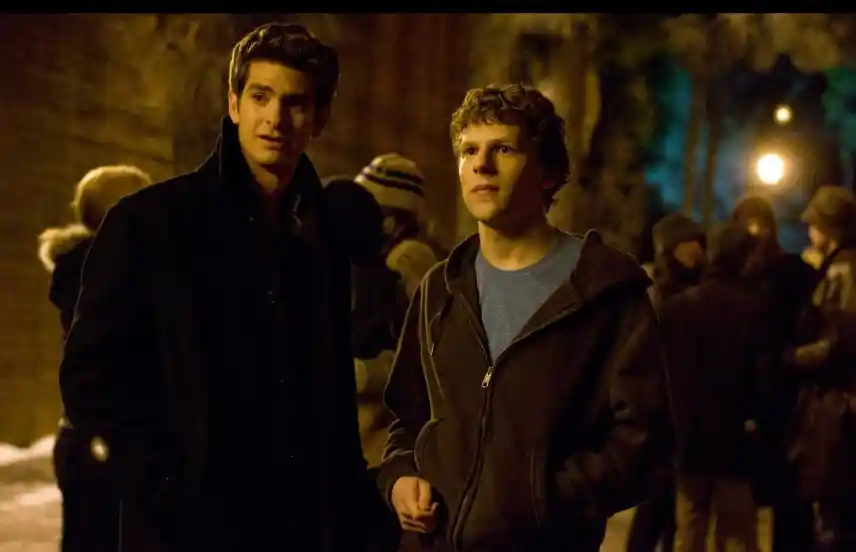
Well, if you are a tech fanatic, then, you have watched the story about Mark Zuckerberg by now. This is a movie shot in 2010 in the documentary category directed by David Fincher entitled “The Social Network.”
The color scheme employed in these movies is a uniform color palette that unites different parts of the movies in a process known as film color grading.
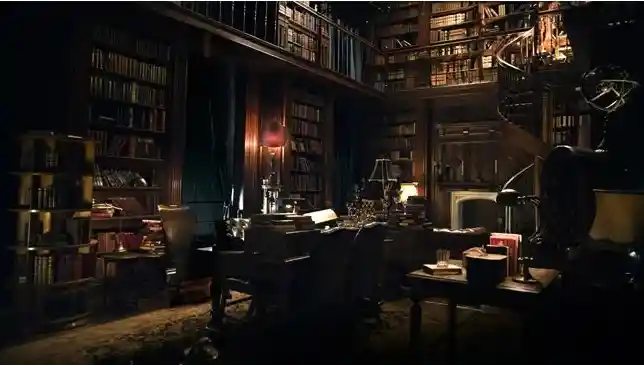
In “Harry Porter,” you will see many warm, bright yellow hues in the first few films, then, darker and blue tones in the subsequent series, Tiffani Bauer.
Before I show you how to unleash the power of color correction and grading to enhance the visual appeal of your videos with Wondershare Filmora, let’s dive into the subject a bit for clarity.
“No matter how good your lighting setup is when you shoot a video, your camera won’t be able to capture colors as accurately as the human eye does, Adobe.”
That is where color correction comes into play.
What is Color Correction?
Color correction refers to adjusting the colors in a video to look like what the human eye will see in real life and achieve a consistent look throughout your clips. This is done to correct any color imbalances or discrepancies caused by factors such as lighting conditions, camera settings, or variations in different shots.
Steven Spicer, a photographer explained color correction in plain language to give beginners a vivid understanding of the subject of color correction in this post published on FXhome.
If that didn’t ring a bell, this is what Aaron Sorkin a featured masterclass instructor who teaches the craft of film and television screenwriting has to say about color correction.
“The colorist also corrects technical color errors. For example, if an actor gives their best performance in a scene with compromised lighting, a film colorist can save the scene by correcting the lighting so it appears consistent with the rest of the film’s footage, Aaron Sorkin.”
While color correction is used to make your movie look as natural as possible, color correction also helps you to maintain the same color throughout all your videos so that you do not have different colors across different scenes.
When shooting scene A at a specific time of the day, if you subsequently switch tapes or locations and scene B ends up looking markedly different from the preceding one, it creates a lack of visual consistency.
Color correction becomes pivotal in this scenario, allowing you to seamlessly apply the same color scheme to both scenes A and B.
Jourdan Aldredge at Vimeo gives you these 5 steps to correct color in a video to have things under control.
Understanding Color Grading
If you have lived in the video editing or film industry for a long time, then, you noticed by now that color correction and grading are twins just like Beatrice and Bernice the twin sisters.
Only that, color correction should be your first color puzzle to solve since you want to make things look as natural as possible before you proceed with adding flavor.
That’s what color grading is, adding flavor to the video. Most movies are better left natural for our eyes and they’ll still make a great movie.
Grading a video is giving it a desired look and feel to make the video appealing to the viewer. While style is the true purpose of color grading, filmmakers and cinematographers also have consistency in mind.
Tiffani Bauer a former video producer at Descript, an editor, and a videographer describes color grading as manipulating raw film and video images to create consistent color tones throughout a motion picture.
Color grading empowers you to set the desired tone for your video or film. Imagine capturing a scene during the day and opting to infuse it with a darker ambiance.
Conversely, you have the flexibility to imbue warmth, transforming your scene into a sun-soaked desert vista, among other creative possibilities.
David Winter wrote an article on Lightworks that throws light on what colors are associated with what genres/scene types. This guide will help you choose your colors appropriately to achieve the best color grading.
Color Grading Central Masterclass
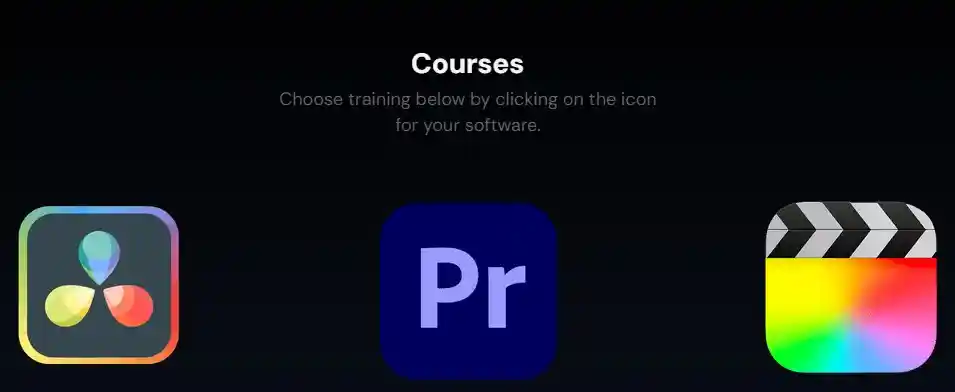
Color Grading Central provides color grading tools and training for filmmakers and colorists using Adobe Premiere, DaVinci Resolve, and Final Cut Pro X to help you become a pro like a Hollywood colorist.
You can join their free 1-hour color grading masterclass by filling out a form with your full name, and email address.
Select your video editing software either Adobe Premiere, DaVinci Resolve, or Final Cut Pro when filling out the form.
Color Correction and Grading in Filmora
Also Read: Filmora for Beginners: A Helpful Guide with Pictures & Videos
1. Open Your Filmora Project
Launch Filmora and open your existing project or create a new one. Ensure that your video clips are imported and arranged on the timeline.
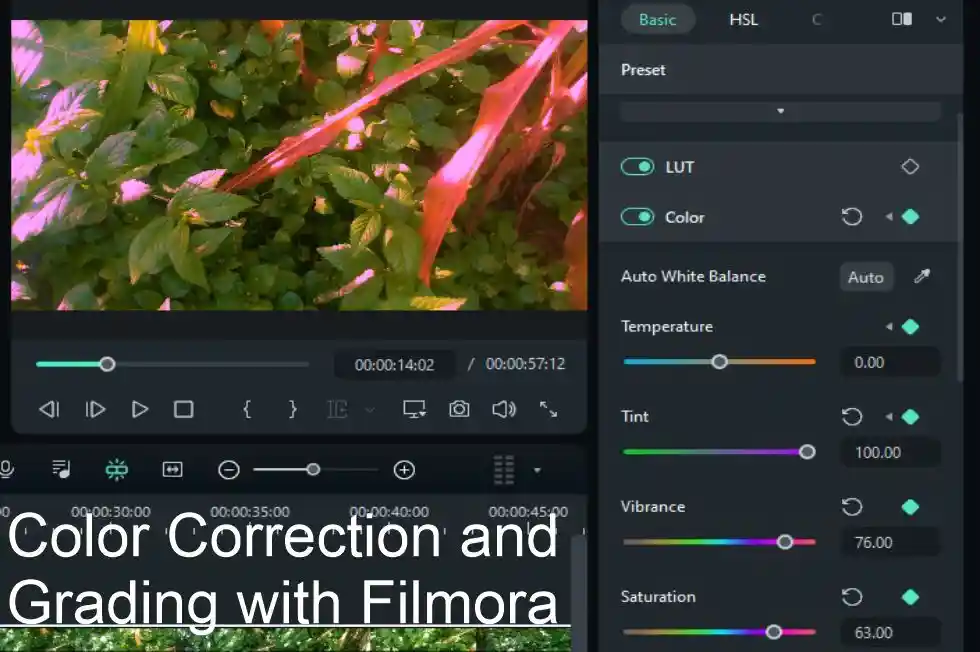
2. Accessing the Color Correction and Grading Tools
1. Click on the video in the timeline to open the “video edit panel.”
2. Click the “Color” tab in the top menu to access Filmora’s color correction tools. Here, you’ll find features to adjust the color balance, brightness, and contrast.
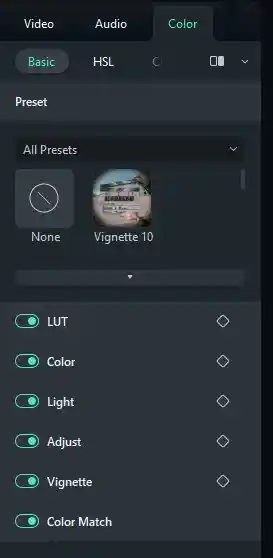
There are 7 sections in the “Color” tab that you can use for color correction including, Preset, LUT, Color, Light, Adjust, Vignette, and Color Match .
Click the caret symbol to hide or reveal the sections. By default, Filmora has expanded the sections. You can also scroll down to access the color sections.
3. Adding Preset Colors
The first section in the “Color” tab is the “Preset.” These are set of premade colors that you can apply to your video. You have different presets to choose from including Vignettes, warm, cool, darken, brighten, etc.
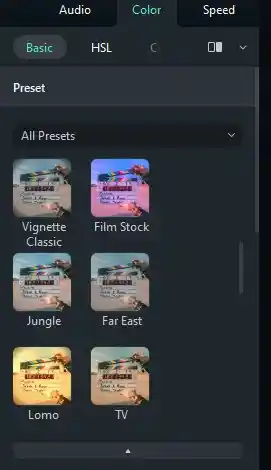
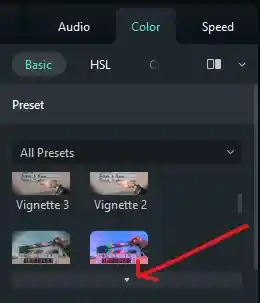
1. Click the caret sign to expand the preset section or drag the vertical scroll bar to navigate the presets.
2. Double-click any preset to apply it. In this case we are picking “Warm Max.”
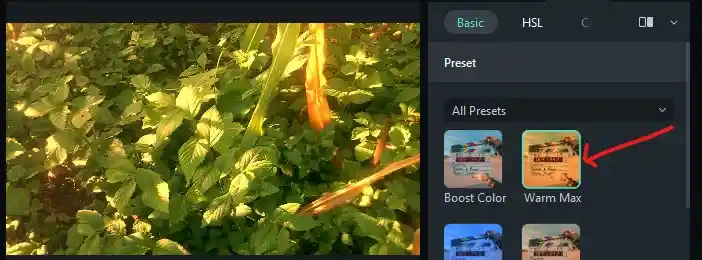
You can also right-click and then click “Apply.”

If you saved any custom color settings, click “Custom” from the dropdown menu to access them.
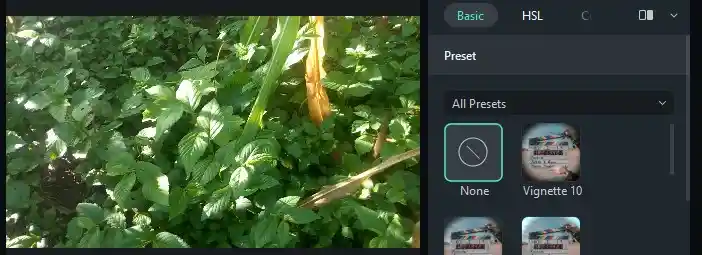
3. To return to the original color of your video, click “None.”
Filmora allow users to hover over the presets to preview them before applying to their video.
4. Understanding Look-Up Table (LUT)
LUT stands for “Look-Up Table,” and it is a set of instructions used in color grading and color correction during video and image post-production.
Filmmakers, photographers, and video editors often use LUTs for creative purposes. They can apply a specific LUT to give their footage a certain mood, style, or atmosphere.
For example, a LUT might be designed to mimic the color grading of a classic film or to create a stylized look like a vintage or cinematic appearance.
LUT help match the color spaces of different cameras or correct color inconsistencies in footage. This is especially important when working with footage shot under different lighting conditions or with different cameras.
LUTs are often saved as small files in various formats, such as .cube or .3dl. The file contains information about how each color in the input (source) should be transformed into the output (target).
There are different types of LUTs, including 1D LUTs that work on a single color channel (like brightness), and 3D LUTs that work on all three color channels (RGB).
Video editing software, including tools like Filmora, provides users with the ability to import and apply LUTs easily. Users can choose from a library of pre-built LUTs or create and customize their own.
How to use LUT in Filmora
1. Select the video in the timeline.
2. Clik the “Color” tab and scroll to “LUT.”
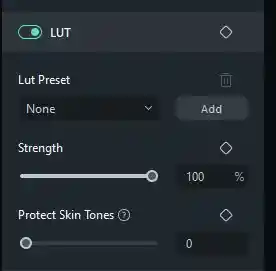
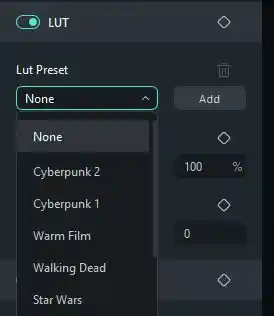
3. Click the dropdown menu to select from the list of available Lut Presets. There are famous movie presets available; Harry Potter, Spatan 300, Walking Dead, Game of Thrones etc.
4. Change the value of the LUT “Strength” by draging the mouse, scroll the mouse wheel, or pressing the up and down keys on the keyboard.
Download LUT from Thrid Party
You can download and install additional LUTs from third party providers and add them into Filmora.
1. Download LUT from thrid party providers.
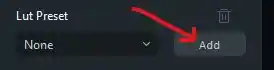
2. Click “Add” in the “LUT” section after dragging a video to your Filmora timeline.
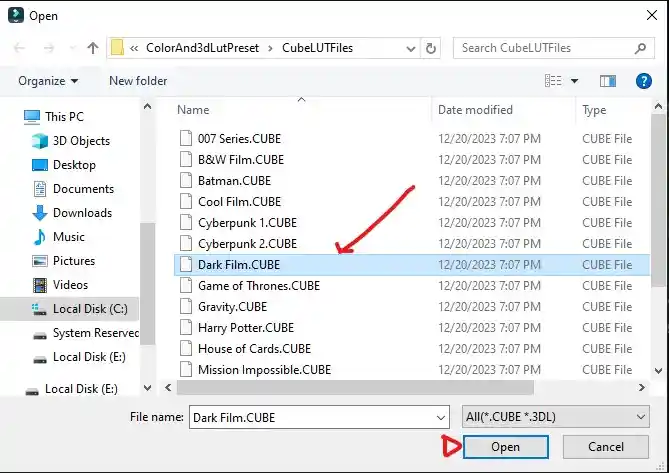
3. Select the custom LUT from the “File Explorer” and click “Open.”
5. Adjusting Color Balance
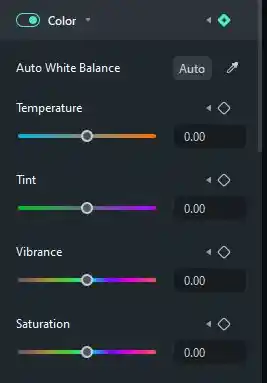
1. Auto White Balance
The “Auto White Balance” automatically adjusts the “Temperature, Tint, Vibrance, and Saturation.” You can as well use the “Pick” tool to pick your desired color to automatically apply to the video.
2. Temperature
Adjusting the temperature alters the balance between warm (red/yellow) and cool (blue) colors.
Use the sliders to warm up or cool down the overall color tone. This is particularly useful for correcting the color cast in your footage.
3. Tint
Adding tint color to an image or video adds a subtle hue or altering the overall color balance. Adjust the slider to fine-tune the intensity of colors in your video.
4. Vibrance
Adjusting vibrance can enhance the realism of an image or video by making colors more vivid without appearing overly saturated.
This can be particularly useful for nature scenes, landscapes, and other content where a natural, vibrant look is desired.
5. Saturation
Consistent saturation levels contribute to a unified and polished look, ensuring that colors complement each other seamlessly.
Enhancing Light
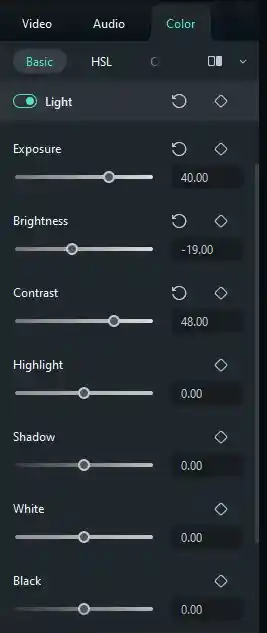
1. Exposure and Contrast Adjustment
Exposure: When working with footage from multiple sources or scenes shot under different lighting conditions, exposure adjustments can help achieve a consistent look throughout the video.
Avoid overexposed footage, where highlights are too bright and details are lost, or underexposed footage, where the image is too dark.
The “Contrast” slider helps control the difference between light and dark areas. Strive for a balance that enhances visibility without losing detail.
2. Highlight and Shadow Controls
Fine-tune highlights and shadows using the dedicated sliders. This allows you to control the intensity of bright areas and the depth of shadows, contributing to a more dynamic and visually appealing image.
Preview and Fine-Tuning
1. Real-Time Preview
Filmora offers a real-time preview of your project. Use this feature to see the impact of color correction adjustments in context with your video.
2. Adjustments Based on Visual Cues
Make color corrections based on visual cues in your video. For instance, adjust colors to match the mood of different scenes or achieve a consistent look across your project.
Conclusion
Mastering color correction and grading in Filmora opens up a world of creative possibilities, allowing you to shape the visual tone and mood of your videos.
Experiment with different settings, explore presets, and trust your artistic instincts as you elevate the overall visual aesthetics of your projects.
Filmora’s intuitive tools make color correction accessible, empowering you to create videos with a cinematic look that captivates your audience.


I like the efforts you have put in this, regards for all the great content.
A big thank you.