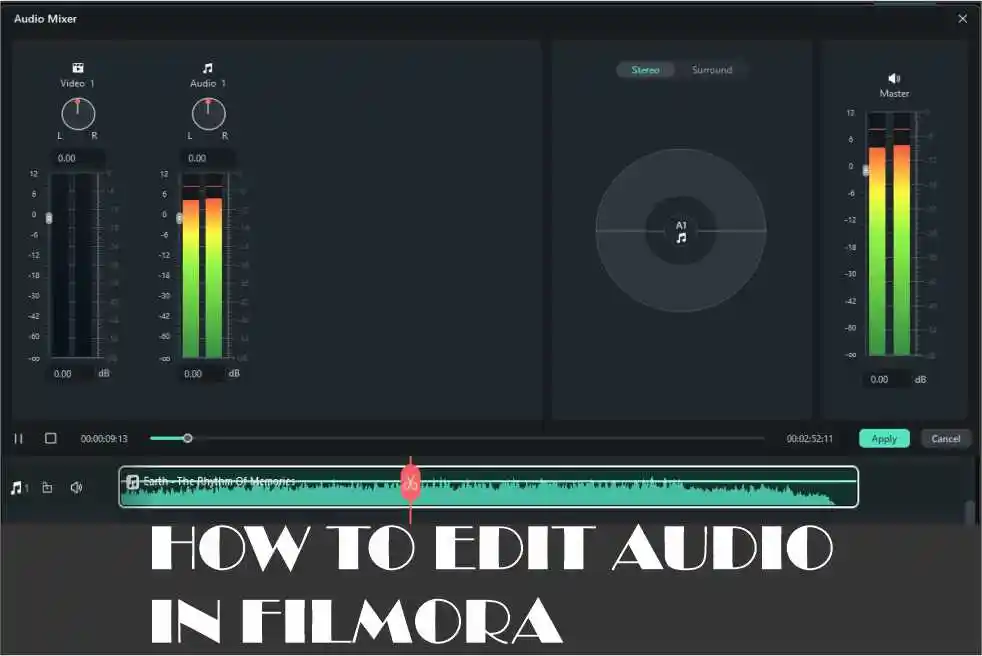
How to Edit Audio in Filmora Like a Pro (with Pictures)
Audio is an essential component in engaging your audience. Invest in a good external audio recorder, select the best audio for you video and edit your audio with the right software.
“People will watch something with poor video quality if the audio quality is good, but they won’t watch something with good video quality if the audio quality and sound effects are poor,” says Tiff. Wondershare Filmora provides a suite of tools for advanced audio editing, allowing you to fine-tune audio levels, achieve balance, and eliminate unwanted background noise. In this guide, I’ll delve into Filmora’s advanced audio editing features to elevate your videos.
1. Open Your Filmora Project
Launch Filmora and open your project. Ensure that your video clips and audio tracks are imported and arranged on the timeline.
2. Downloading Audio in Filmora Audio Library
If you do not have any audio you could download free audio from the Filmora audio library.
To download audio from the Filmora audio library:
1. Go to the “Audio” tab and wait for the audio library to be populated with audio clips.
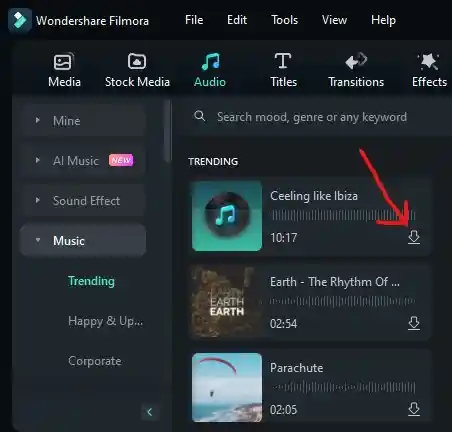
2. You can click on the music to preview it before downloading.
3. Click the download button as shown above to download the track. Wait for a few seconds for the audio to download depending on the size and your internet connection.

4. Drag the audio file to the timeline.

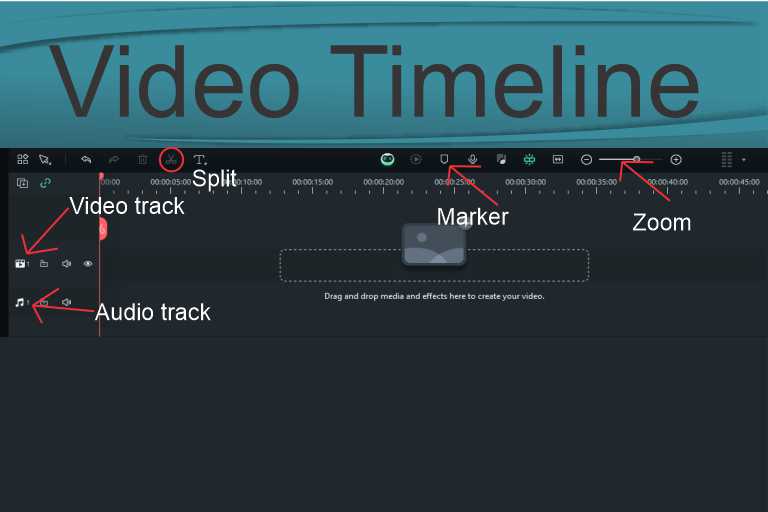
Filmora will automatically place the audio on the “Audio Track.” The audio symbol on the left side of the timeline indicates the audio track.
Have trouble managing the Filmora timeline? You are not alone, that is why I have dedicated an article to the Wondershare Filmora timeline to help you navigate the timeline like a pro.
3. Accessing the Audio Tools
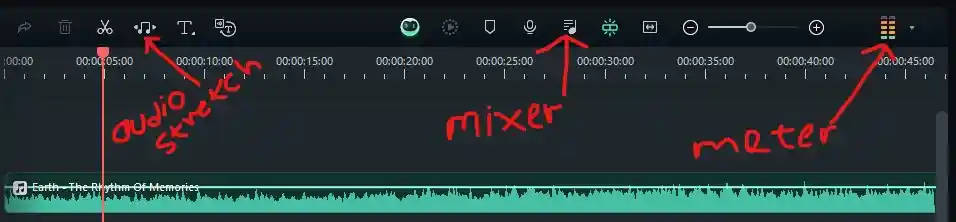
Click on the audio on the timeline to access Filmora’s audio editing tools. Here, you’ll find a range of features to enhance and customize your audio.
Click on the audio on the timeline. After clicking, the audio editing panel will display on the right side of the Filmora window.
The audio editing panel has two main tabs. The “Audio” and the “Speed” tab.
There are two sections on the audio tab, “Adjustment” and “Denoise.”
The “Adjustment” section is the first group of settings you see when the editing panel opens. You can display the “Denoise” section by clicking the “Adjustment” to hide it or scrolling to the bottom of the panel.
Let’s look at the “Adjustment” section.
4. Adjusting Audio Levels
Filmora 13 has added many advanced audio editing tools to make users edit audio like professional audio editing software. You will have to play with these tools over time to master them.
Adjustment Section
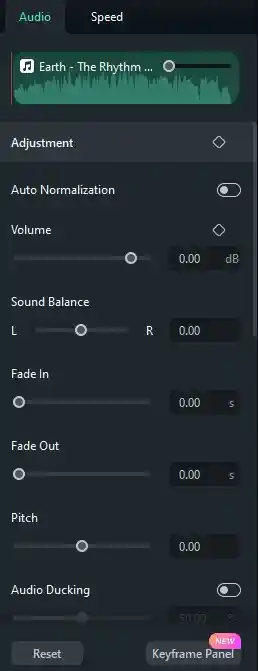
1. Using Auto Normalization
The first tool under the adjustment section is “Auto Normalization.” This tool automatically balances your audio sound without any effort on your part.
If the result is not ok with you, there are many sets of tools in the editing panel that you can work with which we will talk about.
2. Accessing Volume Control
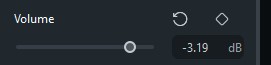
Click on an audio clip in the timeline to select it. In the editing panel, adjust the volume slider to control the overall volume of the selected clip. This is useful for achieving the balance between different audio elements.
3. Using the Sound Balance
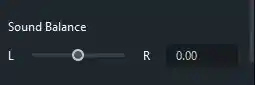
The “Sound Balance” is used to adjust the audio levels between different audio tracks or elements within a video project.
This tool allows you to control the volume of individual audio clips to achieve a balanced and cohesive sound in your final video.
Use the “Sound Balance” in the editing panel to balance your sound by moving the slider to the left “L” or right “R.”
4. Using Fade In/Fade Out to Control Audio
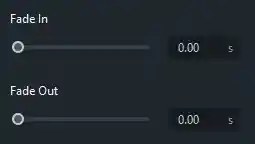
The “Fade In/Fade Out” is an important audio editing tool for both video editors and sound engineers.
You may have experienced this effect in action countless times, but understanding the underlying functions might still be a mystery. It’s time to put these tools to the test.
Fade-in is a transition effect applied to the beginning of an audio clip. It gradually increases the volume from silence to the desired level, creating a smooth and natural introduction to the audio.
Fade-out is a transition effect applied to the end of an audio clip. It gradually decreases the volume from the current level to silence, providing a smooth and natural conclusion to the audio.
“Fade in” helps ease the listener into the audio, while “fade out” helps the audio blend smoothly into silence or another audio element.
Adjust the tools accordingly to see them in action.
In Filmora 9, you could manually adjust the fade-in and fade-out by simply moving the soundwave of the audio. I am yet to figure this out in the Filmora 13.
I’m not sure this feature still exists. I don’t know why Filmora will remove my favorite function, it used to make work easy.
5. Adjusting the Pitch
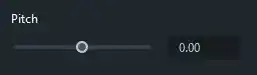
The pitch adjustment tool allows you to alter the frequency of an audio clip, thereby changing the pitch or tone of the sound. This can be useful for creative effects or correcting pitch discrepancies.
6. Setting Audio Ducking
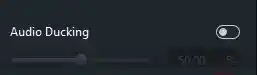
Audio ducking is a technique used to automatically lower the volume of one audio track when another track is playing. This is often employed to ensure that background music or sound effects don’t overpower dialogue or other essential audio elements.
7. Accessing the Equalizer
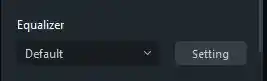
The “Equalizer” is the last tool in the “Adjustment” section.
Equalization helps balance frequencies and improve the overall sound quality.
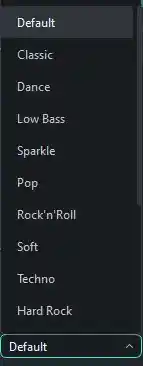
Experiment with different equalizer presets or manually adjust the sliders to customize the equalization settings based on the specific characteristics of your audio.
To use the default presets by Filmora, click the caret sign under “Equalizer” and pick any of the presets to experiment with.
If you are not satisfied with the presets, click “Setting” to customize the equalizer to your liking.
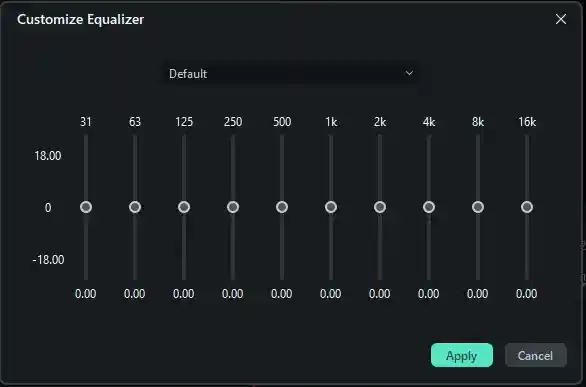
After adjusting the sliders, click “Apply” to save the settings.
5. Removing Background Noise
Filmora provides the “Denoise” tools to eliminate background noise.
Click on the “Audio” tab, then select “Adjustment” to reveal the “Denoise” section, or scroll to the bottom of the “Audio” tab to locate “Denoise.”
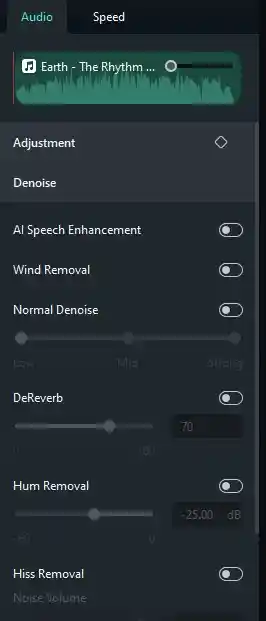
Adjust the settings to reduce or remove unwanted noise from your audio clips.
After applying noise reduction, listen to the audio and fine-tune the settings to achieve the optimal balance between noise reduction and preserving the clarity of the audio.
In the “Denoise” section, you have access to noise reduction tools like AI Speech Enhancement, Wind Removal, Normal Denoise, DeReverb, Hum Removal, and Hiss Removal,
6. Adjusting Audio Speed
The “Speed” tab controls the speed of the audio. And it has two sub-tabs “Uniform Speed” and “Speed Ramping.”
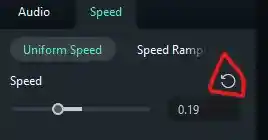
Working with the Uniform Speed
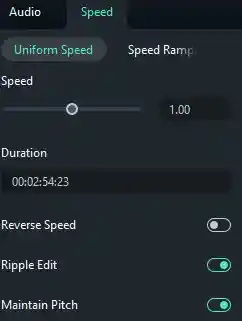
If you want your audio to sound fast or slow you can apply the settings in the “Speed” tab.
Click on the “Undo” command to reset the audio speed.
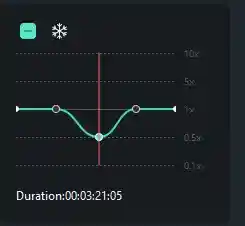
Working with Speed Ramping

Be aware that adjustments made in “Speed Ramping” will take precedence over “Uniform Speed.” This holds whether transitioning from speed ramping to uniform speed or vice versa.
Instead of switching buttons as in uniform speed, the speed ramping gives you curves to work with.
Audio editors will appreciate the familiarity, resembling industry-standard audio editing software.
By default “Speed Ramping” is set to “None.” Pick any of the settings to adjust the speed of the audio by moving the nodes upward or downward.
8. Reset
Finally, you can reset the audio to its default state with the “Reset” command sitting at the bottom of the audio editing panel.
Use the “Reset” button to undo any adjustments made to sound balance, fade effects, pitch, etc to reverse to the default settings.
7. Adding Sound Effects
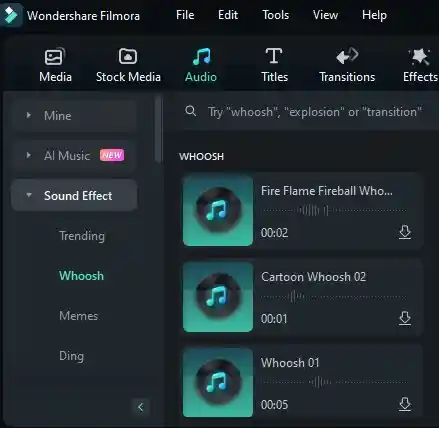
1. Explore Filmora’s library of sound effects by clicking on the “Audio” tab.
2. Click “Sound Effect” located in the left side of the window. You’ll find a variety of effects such as reverb, echo, and more.
3. Click the download button to download the sound that matches your project. Click first to preview the sound effect in the “Preview Window.”
4. Drag the desired audio effect from the library and drop it onto the audio clip in the timeline. Adjust the effect settings in the editing panel to achieve the desired result.
8. Real-Time Preview and Fine-Tuning
Filmora offers a real-time preview of your project. Use this feature to listen to the audio edits in context with the video and make adjustments accordingly.
Sync audio edits with visual cues in your video. For example, align volume changes with scene transitions or adjust background music to complement the mood of specific video segments.
9. Exporting Your Video
Before exporting your video, ensure that the audio edits enhance the overall viewing experience. Make any final adjustments if needed.
Click on the “Export” button, choose your desired export settings, and let Filmora render your final video with the refined and polished audio track.
Conclusion
Mastering advanced audio editing in Filmora allows you to create videos with exceptional auditory quality. Whether you’re adjusting volumes, balancing frequencies, or eliminating background noise, these tools empower you to fine-tune your audio for a professional and immersive viewer experience.
Experiment with different settings, trust your ears, and let Filmora be your ally in achieving audio perfection in your video projects.


I really liked your site.
Thank you.
Cool website.
I really liked your site.
Cool website.
Thanks.
Hello Neat Post, I noticed a problem with your website in Internet Explorer. Could you please check this? IE remains the market leader, and a significant number of people will bypass your excellent writing because of this issue.
Hey, cool post.
Thanks.
Cool website.
Yes sir.
I really liked your site.
Welcome!
You will definitely like it.
And thanks for liking it.