WHAT’S NEW
VIDEO EDITING
GRAPHIC DESIGN
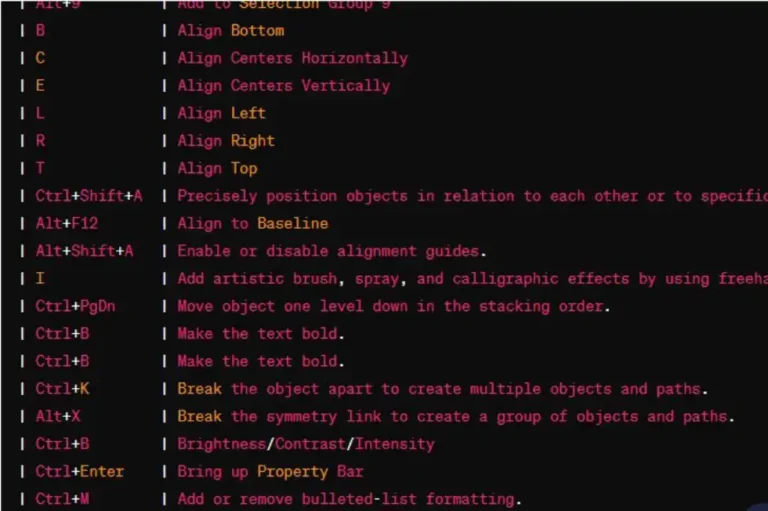
251+ CorelDraw Shortcut Keys: x3, x5, x6, x7 – 2021
Shortcut keys, also known as keyboard shortcuts or hotkeys, are combinations of keystrokes that perform a specific action within a software program.


Shortcut keys, also known as keyboard shortcuts or hotkeys, are combinations of keystrokes that perform a specific action within a software program.