How to Edit Video with FlexClip: Step-by-Step Guide
With the rise of online video editing tools like FlexClip, content creators, marketers, educators, or anyone wanting to share memories with friends and family can edit professional-quality videos.

Whether you are new to video editing or FlexClip video editing software, this step-by-step guide will teach you how to edit video with FlexClip, complete with illustrations. Learn everything from creating a FlexClip account to importing your footage, adding special effects, and exporting your final masterpiece.
How to Edit Video with FlexClip
FlexClip is a user-friendly and versatile online video editing software that empowers users to create professional-quality videos with ease.
From the word go, I like every feature of this software and I’ve been getting my hands dirty with FlexClip tools for some time now.
While FlexClip is easy to learn on your own, with my expertise in other video editing software and FlexClip, this tutorial will get you going in a few minutes.
Let’s jump in right away!
1. Sign Up and Log In
First things first, head to the FlexClip website and sign up for an account if you haven’t already. Once you’ve registered, log in to access the editing interface.

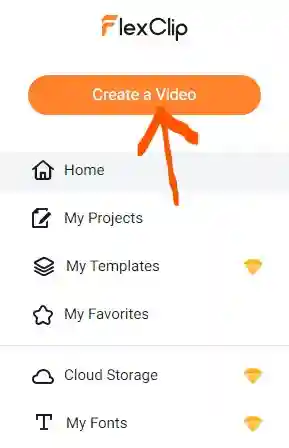
2. Start a New Project
Click the “Create a Video” button in your dashboard to start a new project.
You’ll be prompted to choose an aspect ratio for your video, such as 16:9 for widescreen or 1:1 for square videos, depending on where you intend to share your video.
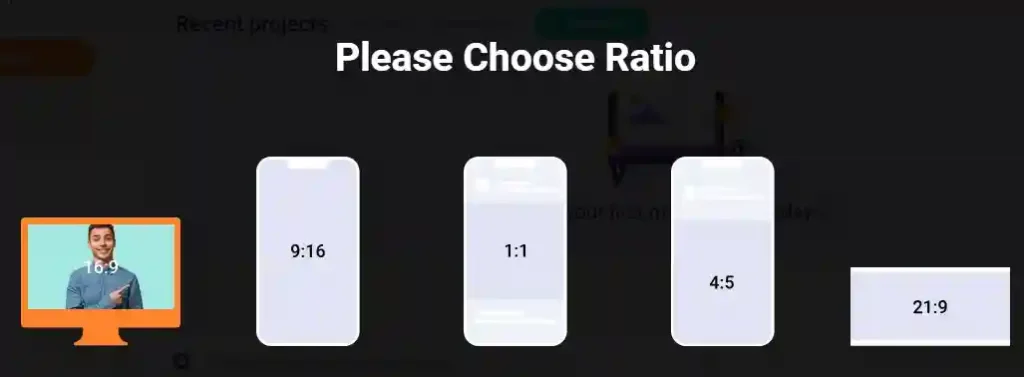
After selecting the right aspect ratio, click “Get Started.”

3. Import Your Footage
Now it’s time to import your video footage.
Click the “Import Media” button to open the “File Explorer” to upload video clips, images, and audio files from your computer.
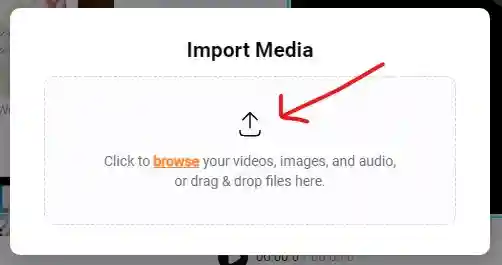
You can also drag and drop media files.
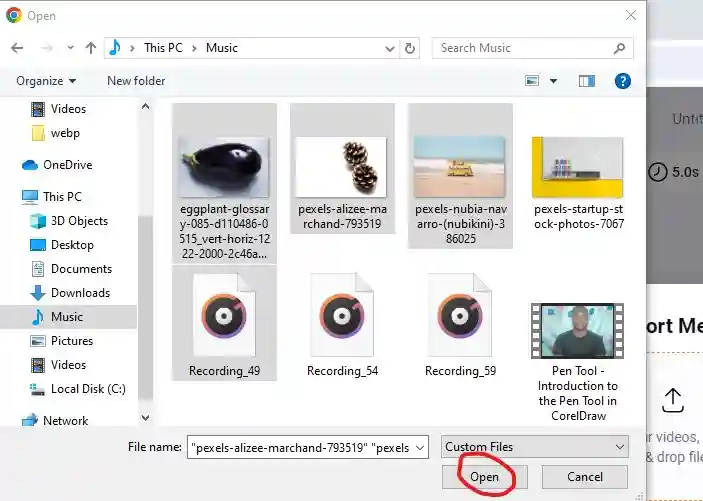
Select a file or multiple clips and clip “Open.”
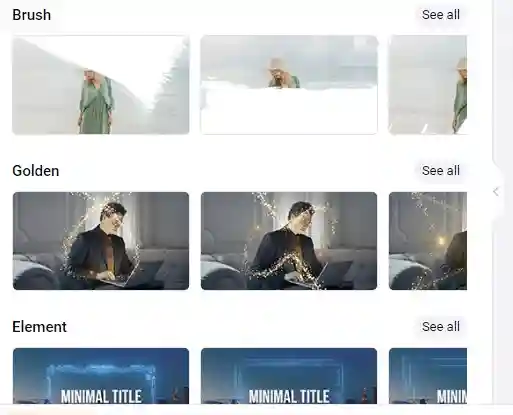
If you do not have clips to upload locally, choose from FlexClip’s extensive media library.
Click the “Video, Image, or Audio” tab and choose a clip from the media library.
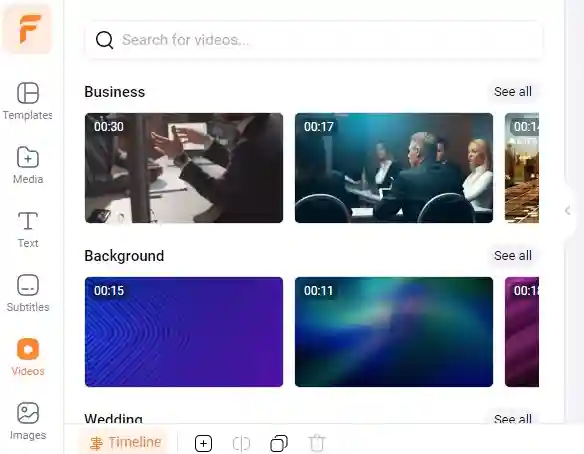
Click the “+” sign or drag and drop the clip to the timeline.
4. Name Your Project
Click the “Untitled” field in the upper right corner of the “Preview Monitor” and type the name you want to give your project.

After typing the name, click a blank space or press the “Enter” key on the keyboard to save changes.
FlexClip, I guess uses Ajax functionality to save files so you do not have to click any save button.
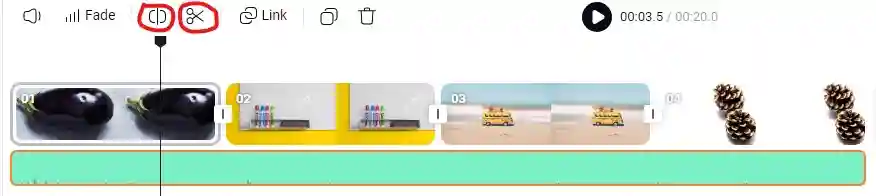
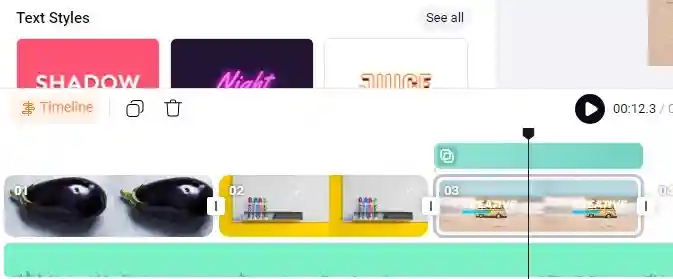
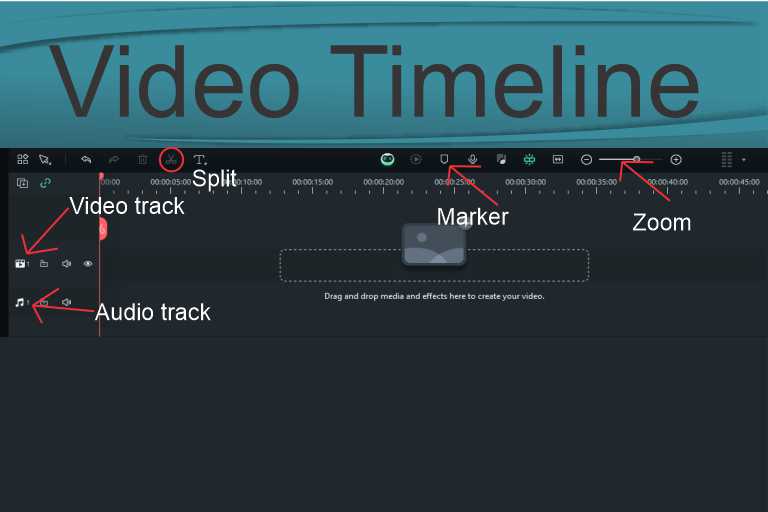
5. Arrange and Trim Your Clips
Once your footage is uploaded, drag and drop them onto the timeline in the order you want them to appear in your video.
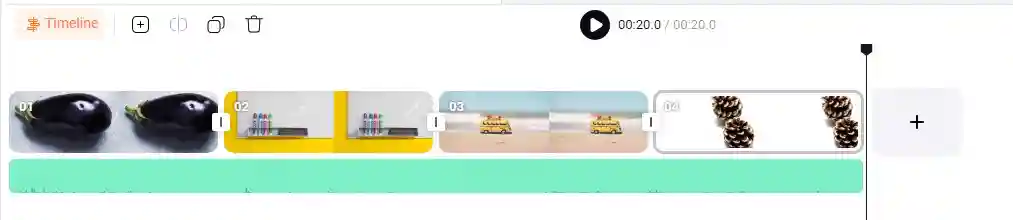
Use the trim tool to cut out unwanted sections or trim the clips to the desired length.
Select the clip you would like to split or trim.
Click the “Split” or “Trim” tool in the timeline.
6. Add Effects
Enhance the flow of your video by adding transitions between clips. FlexClip offers a variety of transition effects to choose from, such as fades, wipes, and slides.
Click the “Effects” tab and drag the effects to the timeline to experiment with different effects to find the perfect fit for your video.
7. Incorporate Text and Titles
Click “Text” to add text overlays and titles to your video to provide context, and captions, or to highlight key points.
Choose from a range of fonts, colors, and styles to customize your text to match your branding or personal preference.
Position the “Playhead” where you will want to add the text and select any text from the “Text” tab by clicking.
Use the “Preview Monitor” to edit the text.

You can also change the font by clicking on the current font and selecting a new font from the font library.
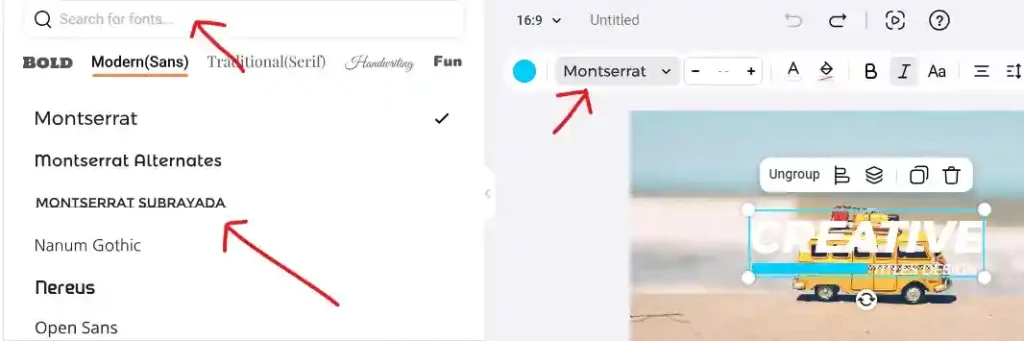
Use the search bar to search for fonts.
8. Include Music and Sound Effects
Set the mood for your video by adding background music or sound effects.
Upload your audio files or choose from FlexClip’s library of royalty-free music tracks and sound effects.
Adjust the volume levels to balance the audio with your video clips.
Click the “Audio” tab and select audio from the audio library by clicking the “+” sign or drag the audio clip to the timeline. FlexClip will automatically place the audio clip in the audio track.

If you know the title of the audio, type the title in the “Search bar.”
9. Apply Filters to Video
Give your video a polished look by applying filters. FlexClip has several filter presets like “Mono, Vintage, Chromatic, and Scene.”
Select the scene you would like to apply the filter and click the “Filter” button located above the “Preview Monitor.”
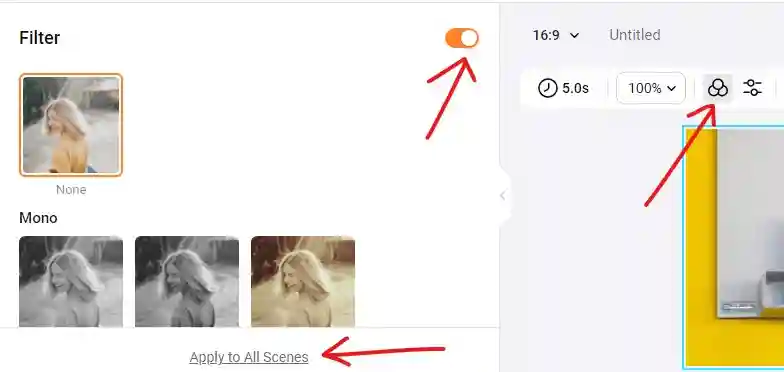
By default, FlexClip has turned the “Filter” on. If this is not the case, toggle the “Filter” using the “Turn on/Turn off” button.
Click to apply the filter that best describes your scene. You can also click the “Apply to All Scenes” to apply the filter to all your scenes.
10. Adjust Color
With FlexClip “Adjust” tab, experiment with color correction, saturation, brightness, and contrast to enhance the visual appeal of your footage.
Click the “Adjust” tab located above the “Preview Monitor” and turn on the “Adjust” if not turned on already.
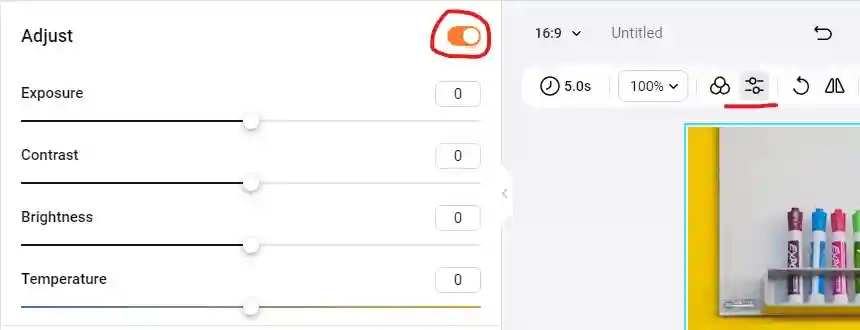
Drag the sliders forward or backward to adjust the color of your video to suit your story.
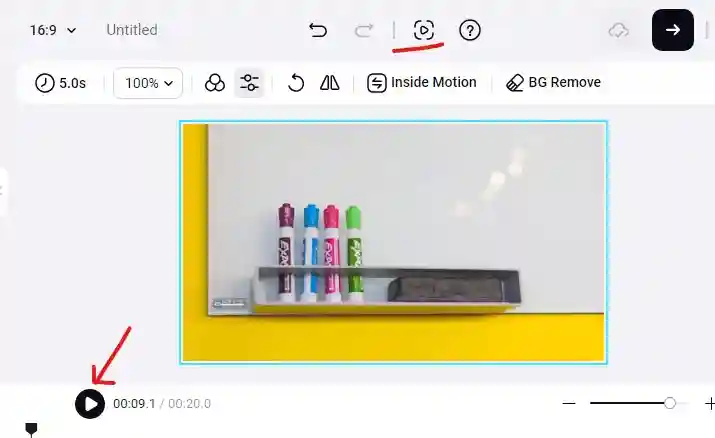
11. Preview and Fine-Tune
Once you’ve completed the editing process, preview your video to ensure everything looks and sounds just right.
Make any necessary adjustments to timing, transitions, or effects to achieve the desired result.
Click the play button or press the spacebar to preview the video. To preview the video in full screen, Click the “Full Screen Preview” button.
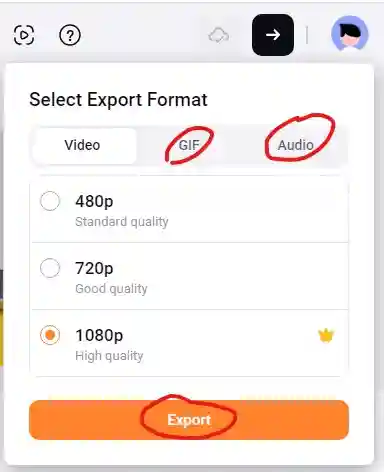
12. Export Your Video
When you’re satisfied with your video, it’s time to export it.
Click the “Export” button.

Choose the desired resolution and file format for your video, then click on the “Export” button to generate the final video file.
13. Share Your Video
Congratulations, you’ve successfully edited your video with FlexClip! Now it’s time to share your masterpiece with the world.
Upload your video to social media platforms, and websites, or share it with friends and family.
FlexClip AI-Powered Tools
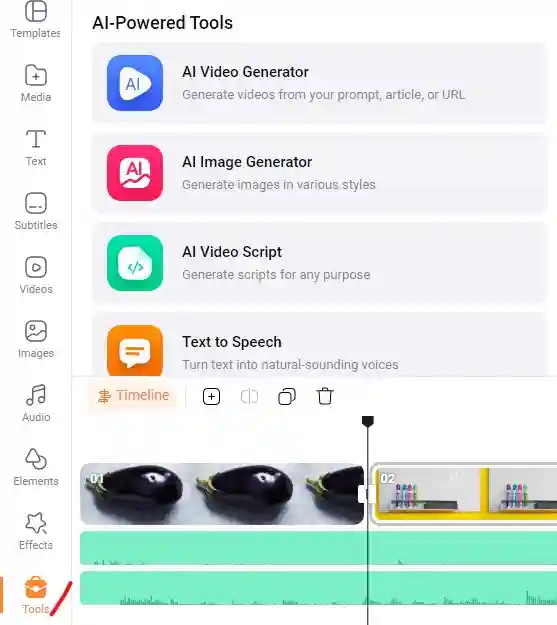
FlexClip offers a suite of AI-powered tools that empower users to create stunning videos effortlessly.
With features like automatic Text-to-Speech, AI Image Generator, and AI Video Generator, FlexClip streamlines the video creation process, allowing users to focus on content rather than technicalities.
Whether it’s for social media, marketing campaigns, or personal projects, FlexClip’s AI tools make video production accessible to everyone, regardless of skill level.
Click the “Tools” tab, in the AI-Powered Tools column, and select an AI tool according to your need.
Conclusion
FlexClip is a powerful yet user-friendly tool that empowers anyone to create professional-quality videos with ease.
FlexClip is easy to learn. In less than an hour, you can start to edit videos. Go ahead and create your first FlexClip video to flex your muscles and friends.
Let me know in the comments your favorite FlexClip feature. Is it the AI tools, the Filter, the Text, or the Effects tool?
Happy editing!


I genuinely admired what you’ve accomplished here. The outline is elegant, your written content fashionable, however, you seem to have acquired some unease about what you wish to present going forward. Undoubtedly, I’ll revisit more often, similar to I have nearly all the time, in case you sustain this ascent.