Import and Edit Video in Filmora Timeline
Start to finish guide on how I edit videos in Filmora video editing software to help you step up your video editing game.
Wondershare Filmora stands out as a user-friendly yet powerful video editing software, making the process of setting file structure, importing and editing videos easy for beginners. I’ve done it over and over again. In my video editing blueprint, you’ll learn how to import and edit video in Filmora timeline.
How to Import and Edit Video in Filmora Timeline
Video editing starts right before you sit in front of your computer to launch your video editing software.
Planing your video gives you enough room to edit your video with ease to produce brilliant output. One of the things that makes the work easier for you is understanding the plots and the subplots.
With this, you know which footage to lay first on the timeline and the one that follows next and so forth.
This understanding greatly influence how you organize your media files. So you interlace your scenes quickly but nicely.
I have been editing videos for individuals and companies since 2013, using Filmora. I am well-versed in the ins and outs of the software, but more importantly, I understand what makes great video editing.
I’m sharing my blueprint with you, so you don’t have to spend years discovering it the hard way.
Let’s get started!
1. Categorize Media Files
Plan your media file category ahead of time before you launch your application.
Efficient file organization becomes evident when tackling extensive projects, emphasizing the significance of categorizing your files based on both file type and relevant scenes.
Create separate folders based on file types, i.e. video clips, audio clips, images, plots, and B-roll. Load the media files into these categories of folders so that you can easily identify them during import.
2. Opening Filmora and Creating a New Project
Begin by launching the Filmora application on your computer. Once opened, you’ll be greeted with the home screen. Click on “New Project” to start a new video editing project.
3. Name Your Project
After clicking on “New Project,” you will be taken to Filmora’s backend where all the editing happens.
As a beginner, you will be tempted to import your media and begin editing but before moving on, click the “File” menu and select “Save Project As” to name your project.
Naming your project is important. It helps you identify it quickly to save time.
You also want to save your project right after launching Filmora so that you can save every bit of change you make to the project to prevent file loss during power outages, software crashes, or system failure.
Learn how to speed up video editing to meet deadlines.
4. Organizing Your Media
While you will want to import your media before organizing them, in a large project do vice versa.
Organize your media first by taking advantage of Filmora’s organizational features.
Create Folders
Create folders according to the ones we created first before launching Filmora. These folders will group related media within the media library.
This helps maintain a tidy workspace, especially for projects with numerous files.
5. Importing Media Files
Now that you have your folders, import the media files according to the folders.
Click on a folder to open it and click to import the right files into the folder to maintain order and increase speed.
If you are not working on a big project, you can import the media files into the default Filmora folder without categorizing them. When you have less media to work with, it is easy to identify these files.
When importing your media files into Filmora, you can do this in a few different ways:
1. Import from Local Storage
This is the most common method. You can click on the “Import” button within Filmora or directly drag and drop your video files from your computer’s local storage (hard drive or external storage) into the Filmora media library. This method is ideal for clips stored on your computer.
2. Import from Cameras/Phones
If your videos are on a connected camera or mobile device, Filmora has a built-in import tool. Connect your camera or phone to your computer, choose the import option, and Filmora will guide you through the process of transferring the files to your project. This method is useful for importing footage directly from your recording devices.
3. Import from Social Media
Filmora allows you to import media directly from social media platforms such as Facebook or Instagram. By linking your account, you can access and import videos from your social media profiles directly into your Filmora project.
4. Import from DVD
Filmora enables you to import video clips directly from DVDs. If you have footage stored on a DVD, you can use the import function to bring these clips into your Filmora project for editing.
5. Media Panel Import Options
Within the media library, Filmora provides options to import media directly from the media panel. Clicking on the “+” icon allows you to choose files from your computer, import from your phone or camera, or even capture live video from your webcam.
6. Library Effects and Elements
Filmora comes with a library of built-in effects, transitions, and elements.
While not importing clips in the traditional sense, you can directly drag and drop these effects from the library onto your timeline to enhance your video.
6. Define Your Aspect Ratio
This is a commonly overlooked aspect for beginners, yet even professionals may sometimes overlook it due to the pressures they face.
Whiles given less attention in video editng tutorials, it is the pillar of each video you create. The aspect ratio you choose will determine how your video fits the screen it is been viewed on after exporting.
Another thing to keep in mind is that, each online platform has a predefined aspect ratio for the videos published on their platform.
Not meeting the specific aspect ratio will hide parts of your video on the respective online platform.
So, remember to read about the aspect ratio of the platform you intend to create your video for before you create your video.
Choose Aspect Ratio in Filmora Launch Pad
Most editors are likely to miss this part. And if you do, you can always set it following the next topics.
1. Launch Filmora
2. In the Filmora launch pad, locate “Aspect Ratio” and drop down the list and select the one that best suits your video.
3. Click “New Project.”
The aspect ratio selected becomes your ratio when Filmora redirects you to the backend.
Change Filmora Aspect Ratio in Project Settings
In case you couldn’t set you aspect ratio before creating a project, you can do this in the project settings.
1. Go to the “File” menu and click “Project Settings.”
2. Find “Aspect Ratio” on the window and select your preferred ratio from the drop down.
3. Click “Apply.”
Change Aspect Ratio in Crop and Zoom
1. To change the aspect ratio in the “Crop and Zoom” settings, right-click on the clip and select “Crop and Zoom.”
2. Drop down the list and pick your preferred ratio.
3. Drag the selector to the portion of the video you’d like to display and click “Apply.”
You can change the aspect ratio at any given time but remember that it will affect your entire video so I recommend setting this from the start.
Check out YouTube aspect ratio here.
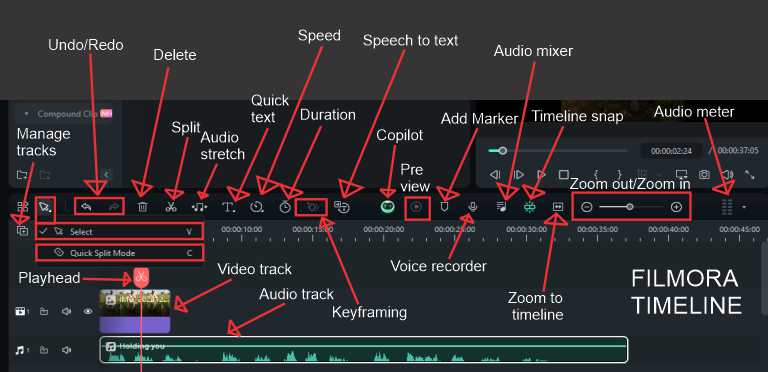
7. Adding Clips to the Timeline
The timeline in Wondershare Filmora is the central hub where users arrange and edit their video clips, audio files, and other elements to create a video.
Also Read: Wondershare Filmora Timeline.
Now that your media is organized, it’s time to start editing on the timeline.
Drag and Drop Clips
Drag your selected clips from the media library and drop them onto the timeline.
Maintain a smooth editing experience in Filmora and ensure an organized timeline by systematically adding files.
Don’t load all your files at the same time to the timeline, it may cause your software to crash.
Use the preview window to review your clips before adding them to the timeline. This step helps you select the best portions of your footage for editing.
I have an article on mastering Filmora performance to troubleshoot lagging and rendering issues to help you edit with Filmora smoothly. Understanding this topic will help you operate your computer efficiently even if you don’t use Filmora.
Trimming Clips
As a video editor, triming is one part of the job you will frequently do. There are couple of triming tools available in Filmora.
Triming helps you cut the unwanted part of the video so that you are left with the consumable part for your viewers.
To trim a clip, position the “Playhead” at the desired point and use the scissors or razor tool to make cuts.
Alternatively, use the handles at the edges of the clips to adjust their duration directly on the timeline.
Move the mouse pointer to the edge of the clip, you will notice a symbol at the end or beginning of the clip. Drag the mouse either to the right or left depending on where the mouse is position to trim the clip.
8. Applying Transitions and Effects
Enhance the visual appeal of your video by incorporating transitions and effects. Transitions and effects give a smooth start or end to your video.
Transitions
Access the transitions library and drag your chosen transition between two clips. Filmora offers a variety of transitions, from fades to slides, to add polish to your edits.
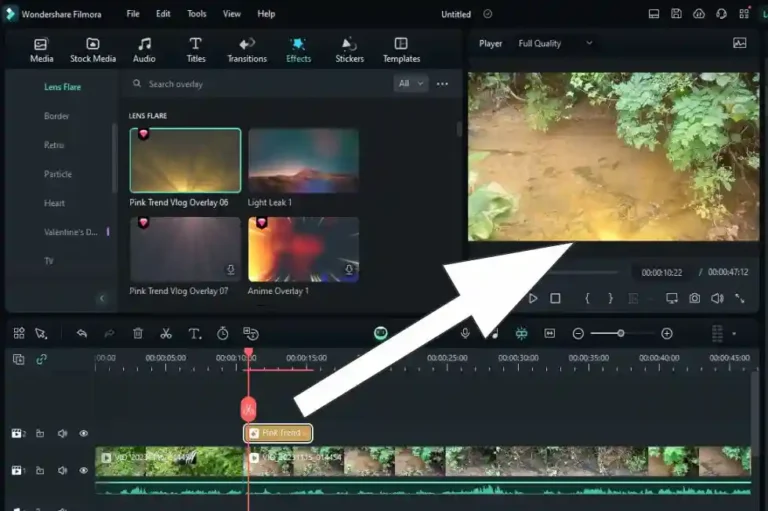
Effects
Explore the effects tab to add filters, overlays, and elements to your clips. Simply drag and drop these onto the timeline, adjusting their duration and position as needed.
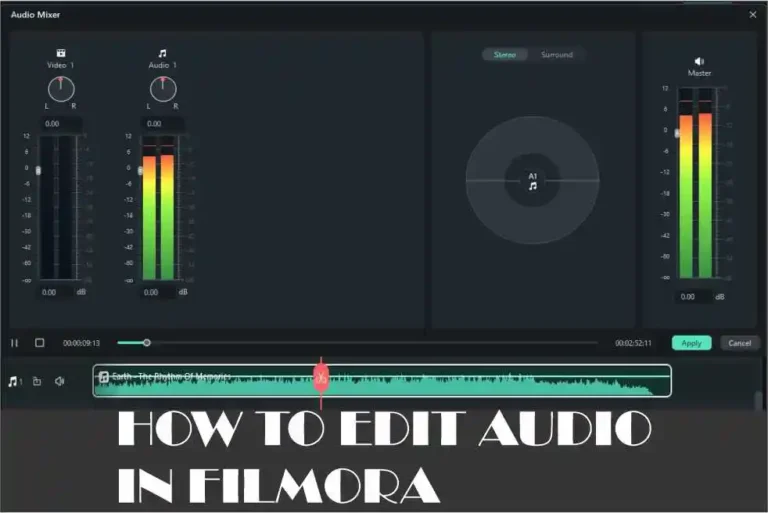
9. Incorporating Audio
Audio is a crucial element in video editing, and Filmora provides intuitive tools for sound editing. Audios bridge the gap between two scenes, and eliminate prolonged silences in your video to captivate your audience from start to finish.
After recording your video tutorials, enhance their effectiveness by incorporating a voiceover. This approach allows you to concentrate on delivering clear instructions during the recording and integrate audio later on.
Adding Music
Import your music files into the media library and drag them onto the audio track in the timeline. Trim and adjust the volume to achieve the desired audio balance.
Voiceovers and Sound Effects
Record or import voiceovers and sound effects, placing them on separate audio tracks. Sync them with your video clips for a professional finish.
10. Preview and Fine-Tuning
Before finalizing your project, take advantage of Filmora’s preview features:
Preview Window
Use the preview window to review your edits in real-time. This allows you to catch any discrepancies or make on-the-fly adjustments.
Should you experience any slug in the preview, press the spacebar on the keyboard to pause the video and press it again to continue.
Press Ctrl+/ to start the preview all over. Learn all the Filmora shortcuts for efficient editing.
If you find yourself consistently encountering lag issues, it’s a clear sign that it’s time to troubleshoot your Filmora. I have dedicated an article for troubleshooting lag and rendering issues in this guide: Mastering Filmora Performance.
Fine-Tune Edits
Refine your edits by adjusting clip positions, fine-tuning transitions, and ensuring a smooth flow in your video.
11. Exporting Your Project
Once satisfied with your edits, it’s time to export your video.
Export Options
Click on the “Export” button, and Filmora will present you with various export options. Choose the format, resolution, and settings that best suit your intended use, whether it’s uploading to YouTube or sharing on social media.
Conclusion
Wondershare Filmora’s user-friendly interface and robust set of editing tools make importing and editing videos a straightforward and enjoyable process.
By following these step-by-step guidelines, you’ll be able to navigate the Filmora timeline with confidence, transforming your raw footage into a polished and engaging video ready to captivate your audience.
Explore the features, experiment with effects, and let your creativity flow as you bring your video project to life in the Filmora editing suite.
I’ve covered various editing methods in Filmora. Comment below on the one you’ll tackle first: creating folders, importing media, defining aspect ratio etc.

I began reading this phenomenal site earlier this week, they create stellar content for visitors. The site owner is doing a terrific job of engaging the audience. I’m impressed and hope they persist with their wonderful efforts.
Thanks a lot.