Filmora Motion Graphics for Beginners: Visual Effects Tips
Filmora motion graphics do not only capture attention but also elevate your visual narrative, making your content more engaging and memorable.
Welcome to the exciting realm of Filmora motion graphics. In this guide, we’ll use the intuitive tools Filmora provides to incorporate animated text and graphics into your videos.
Before we explore the foundational knowledge needed to navigate Filmora’s features effectively and infuse your videos with captivating motion graphics let’s learn a bit about motion graphics.
What is Motion Graphics
Motion graphics means graphics in movement. Motion graphics is about bringing design knowledge to new mediums by adding the elements of time and space — thereby creating movement.
Motion graphics (sometimes mograph) are pieces of animation or digital footage which create the illusion of motion or rotation, and are usually combined with audio for use in multimedia projects.
Motion graphics was officially born in the 1940s, thanks to the experimental work of Oskar Fischinger and Norman McLaren. In the 1950s, equally amazing designers, such as Saul Bass, Maurice Binder, and Pablo Ferro, brought motion graphics more squarely into the public eye.
Explore the potential of a career in motion graphics and gain insights into revenue generation by referring to the accompanying chart.
The chart shows the annual revenue from motion picture, video, and television programs production, sound recording, and music publishing activities in Italy from 2011 to 2018.
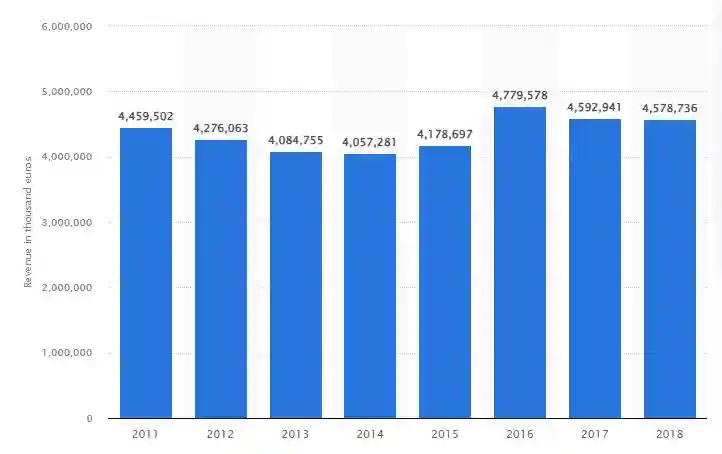
The graphic presents the annual revenue from motion picture, video, and television program production, sound recording, and music publishing activities in Italy from 2011 to 2018.
The revenue of this industry went from 4.45 billion euros in 2011 to 4.57 million euros in 2018.
Source: Statista
How Do You Add Motion Graphics in Filmora?
1. Draw Objects and Export them as PNG
In this tutorial, we will draw a car in CorelDraw and export the car parts separately as “PNG.”

1. Draw your shapes in your favorite graphic design software.
2. Export the objects as “PNG.”
First we will export the body of the car.

Then, we will export the rest of the parts.

Continue to export the rest of the images separately that you can animate them individually.
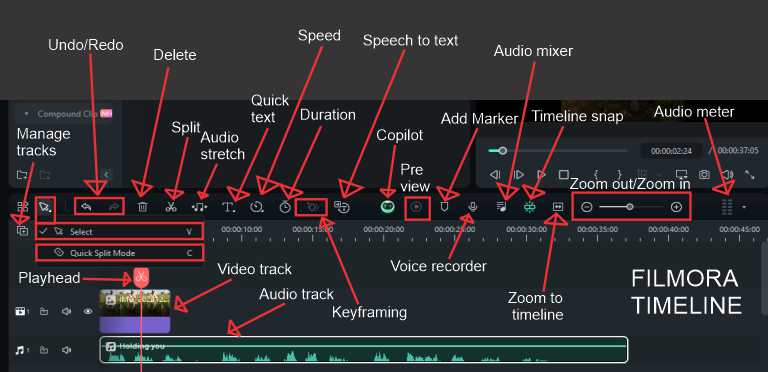
2. Launch Filmora Software
1. Launch Filmora and click “New Project” in the “Launch Pad” to start a new project.
2. Click “Save As” to name your project.
3. Ensure your media files are imported and arranged on the timeline.
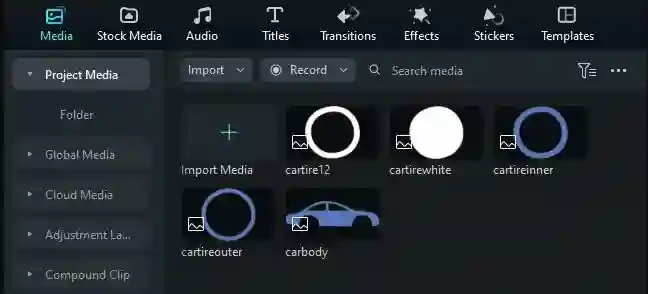
3. Resize the images
Preview your objects and scale down your images if they are wide.
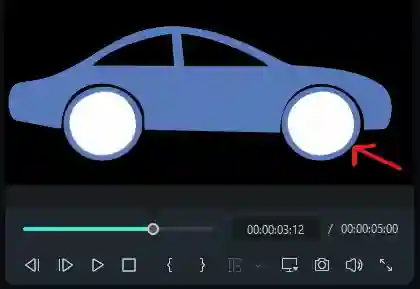
Here I am going to resize my car tires to smaller size before I animate them.
4. Select an Object to Animate
1. Click on the inner tire and head over to the “Editing Panel” and click the “Animation” tab.
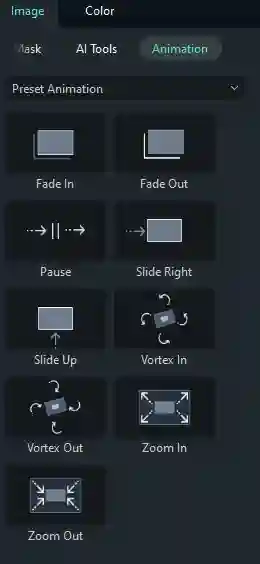
2. Click on the drop down menu to select “Preset Motions (Legacy)” and select “Clockwise rotate to zoom in 2.”
This preset will make your tire rotate in clockwise direction and zoom in.
3. Click on the outer tire and repeat the same process to make it rotate in clockwise direction.
Now you will notice your car only have the back tire if you are following me closely. Let’s fix the front tire now.
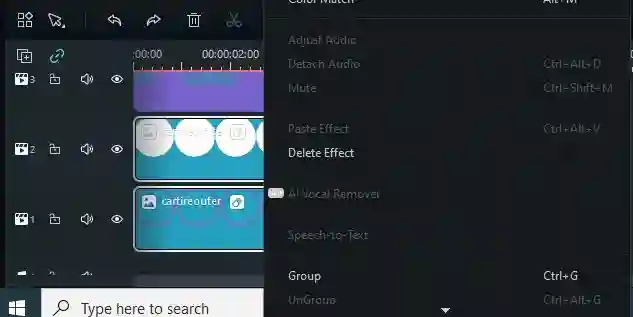
4. Select the inner and outer tires on the timeline by dragging the mouse pointer over them and right-click to choose “Group” in the flyout menu or press “Ctrl+ G” on “Windows.”
5. Increase the number of “Video Tracks” on the timeline and copy and paste the tires so you can have duplicate tires with the same animation.
Make sure you move the tires below the original objects so that they’ll be on the same line.
6. Click on the duplicate tires that you grouped and drag them to the front so that you have something similar to what is in the picture below.
When you play the video, you will notice both back and front tires are rotating clockwise.
7. To drive our car to the right, we will highlight all the objects and group them. Then, we will copy and paste them.

8. Click the objects you have pasted and click “To the Right 1” on the “Animation” tab to make the car move to the right direction.
That’s it you are now driving your car. So nice ha?
But there’s one thing that is missing. Let’s add some animated text to our video.
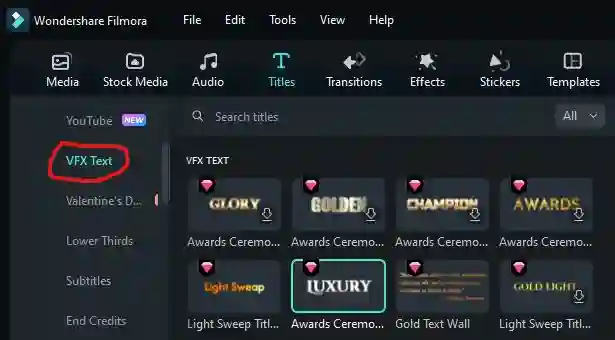
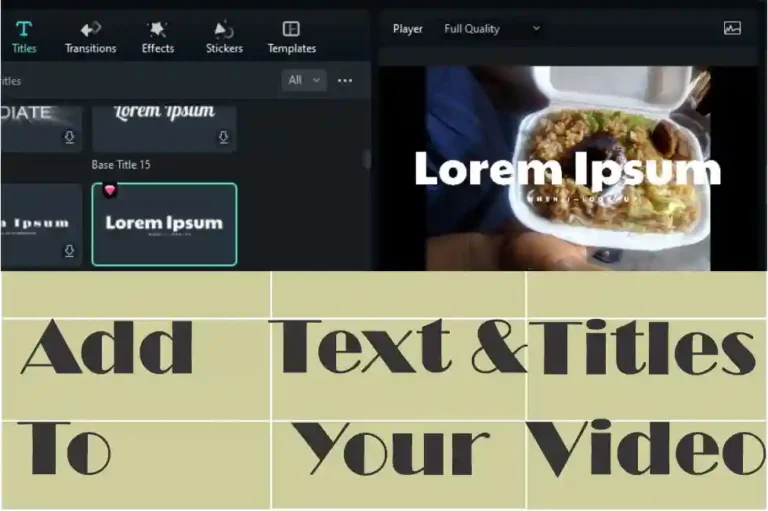
5. Access the Titles Tab
Navigate to the “Titles” tab in the top menu and click “VFX Text.” Here, you’ll find a variety of animated text titles that can serve as a starting point for your motion graphics.
6. Select an Animated Title
Browse through the available animated text titles and choose one that complements your video’s theme. Click on the title to preview its animation.
7. Drag and Drop Text
Once you’ve chosen an animated title, drag it from the “Titles” tab and drop it onto the timeline above the video clip where you want the motion graphic to appear.

In this case, we will drop it above our car.
8. Customize the Text
Click on the added title in the timeline to access customization options in the “Titles” tab. Modify the text content, font, size, color, and any accompanying graphics or elements under the “Basic” tab.
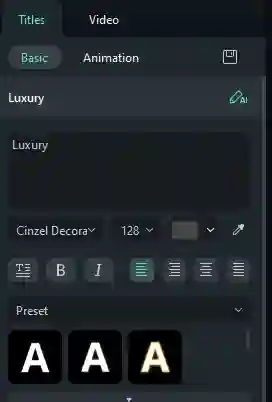
Filmora provides flexibility in tweaking each component to suit your vision.
If your text is not animated already, you can do that in the “Animation” tab like how we have animated the car.
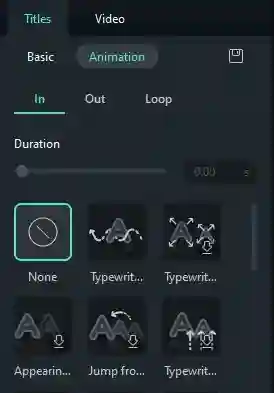
9. Adjusting Motion Settings
Filmora allows you to adjust the motion settings of the title. Click on the “Animation” tab in the editing panel to explore options such as in, out, and loop. Experiment with different motion settings to enhance the visual impact.
Conclusion
Filmora’s intuitive tools empower you to explore the world of motion graphics effortlessly. By adding animated text, titles, and custom elements to your videos, you infuse your content with dynamism and creativity.
This guide serves as your stepping stone to incorporating basic motion graphics, opening the door to endless creative possibilities within Wondershare Filmora.
Let me know in the comment section below which graphic editing software you will use to draw your car and which Filmora motion preset you will be using.

I really like reading through a post that can make men and women think. Also, thank you for allowing me to comment!
Happy to hear that from you Simon.
Just days ago I discovered this awesome website, a standout for fans. The gifted owner keeps visitors riveted with spot-on content. I’m stoked to be a new member of the community and eager to see what interesting content comes next!
Thanks.
Thanks I have just been looking for information about this subject for a long time and yours is the best Ive discovered till now However what in regards to the bottom line Are you certain in regards to the supply